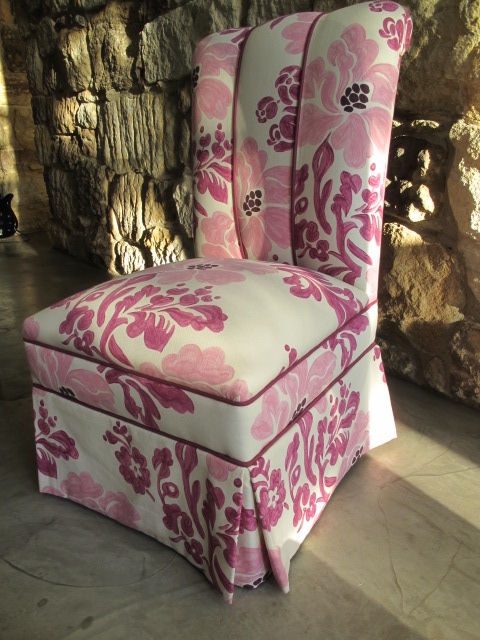
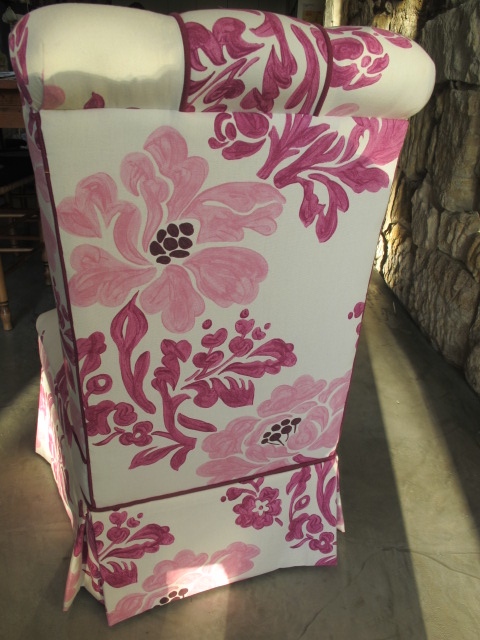
Every girls dream …… a chair that has a hiding place from nosey brothers & sisters.


You could put favourite books, toys, shoes, jewellery – who knows what!!!!!

Every girls dream …… a chair that has a hiding place from nosey brothers & sisters.
You could put favourite books, toys, shoes, jewellery – who knows what!!!!!
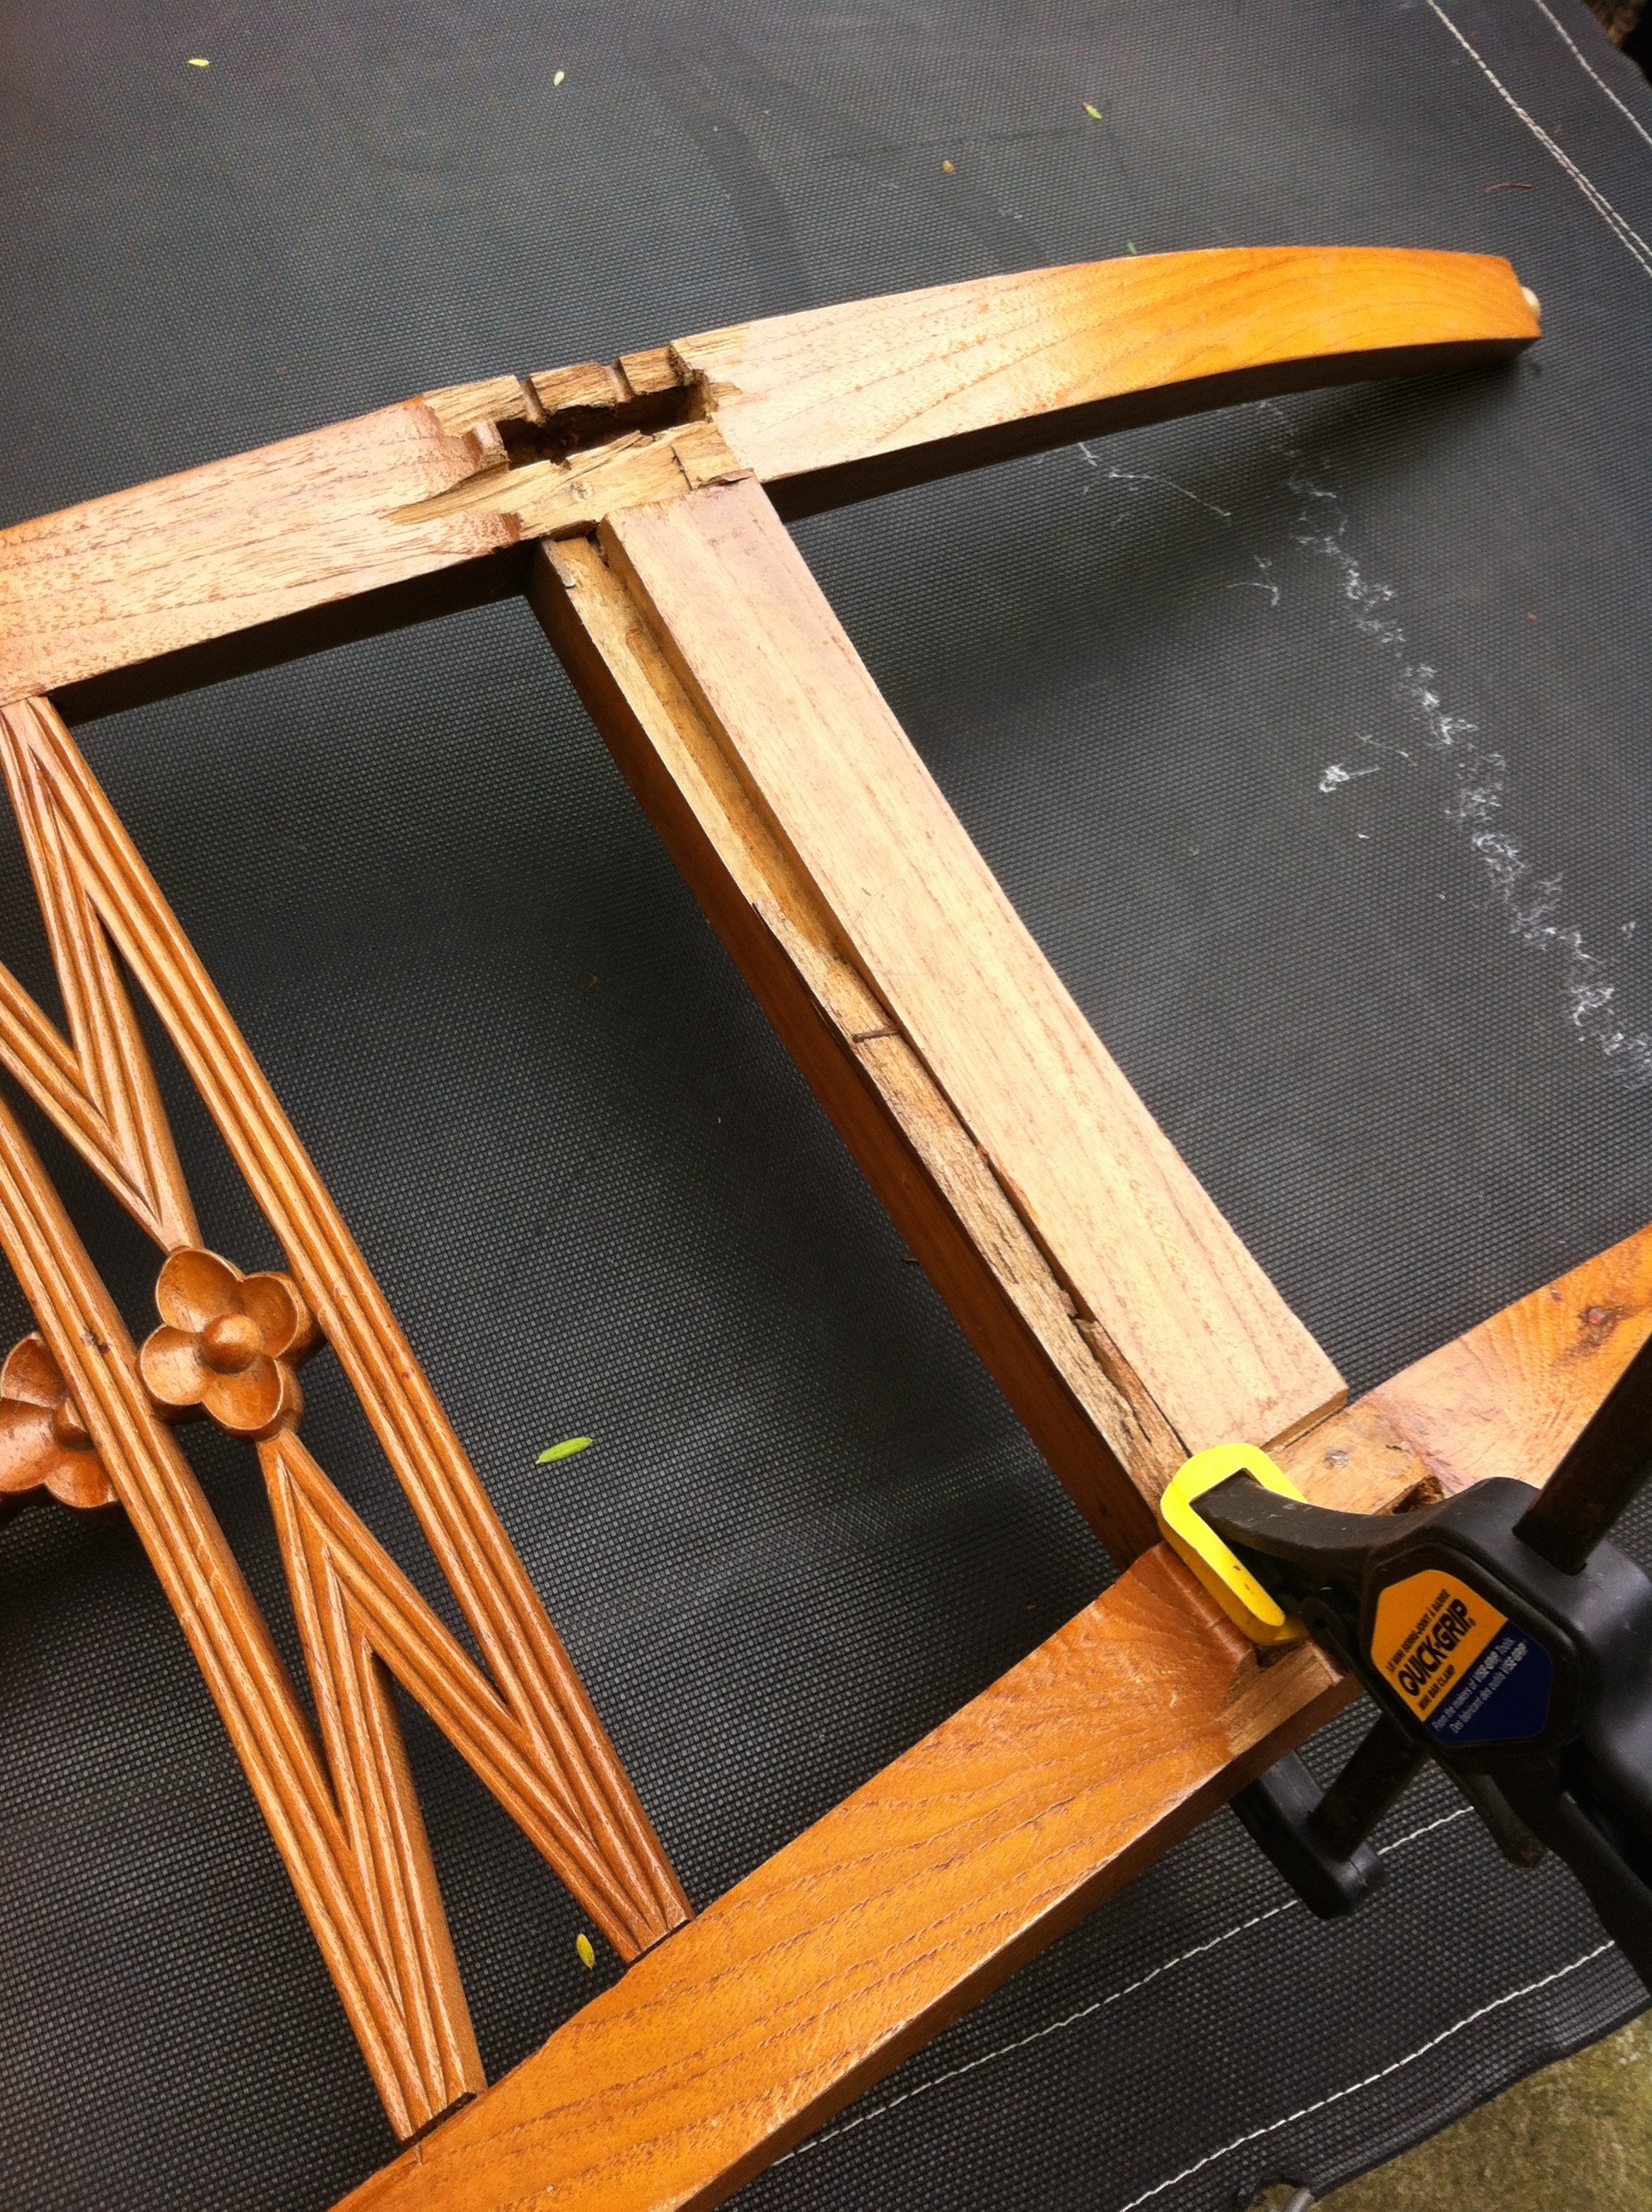
What is it about teenage boys who can’t sit still and need to rock back & forth on the dining room chair.
No matter who I talk to this is a common theme. Of course the inevitable happens , after countless raves at them to stop it – Yep the whole chair breaks. But can it be fixed or do you chuck it out.

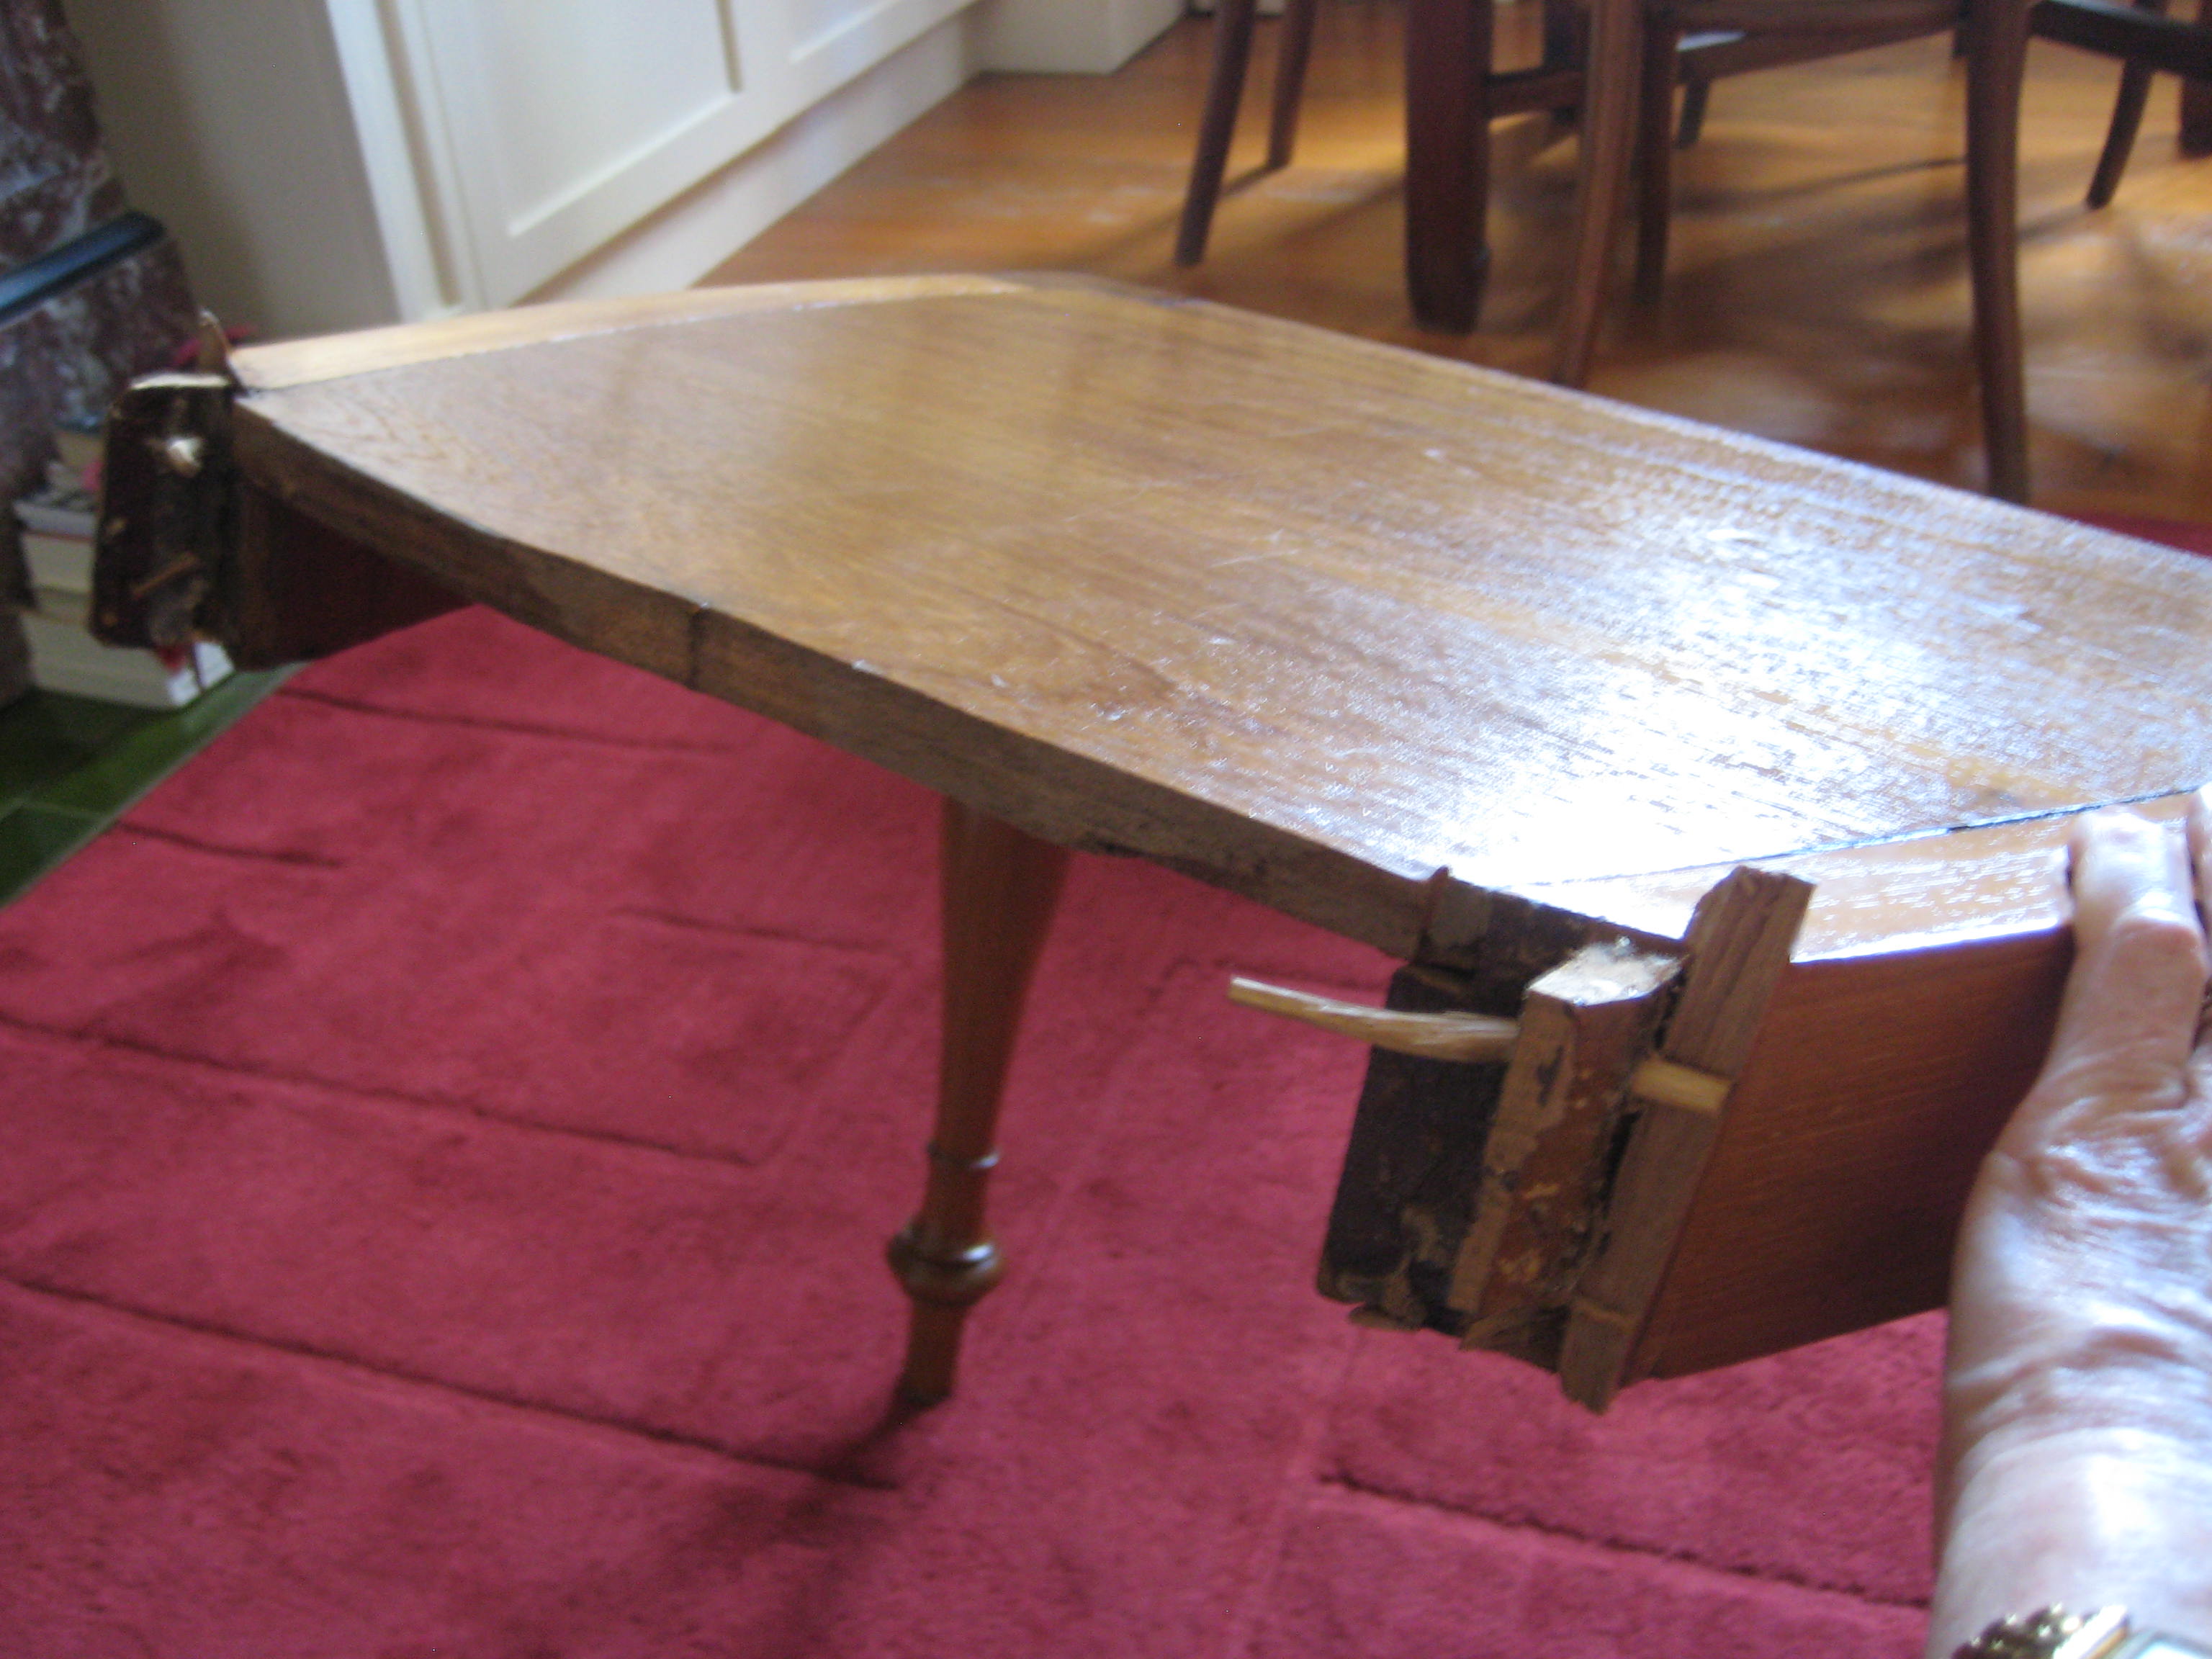
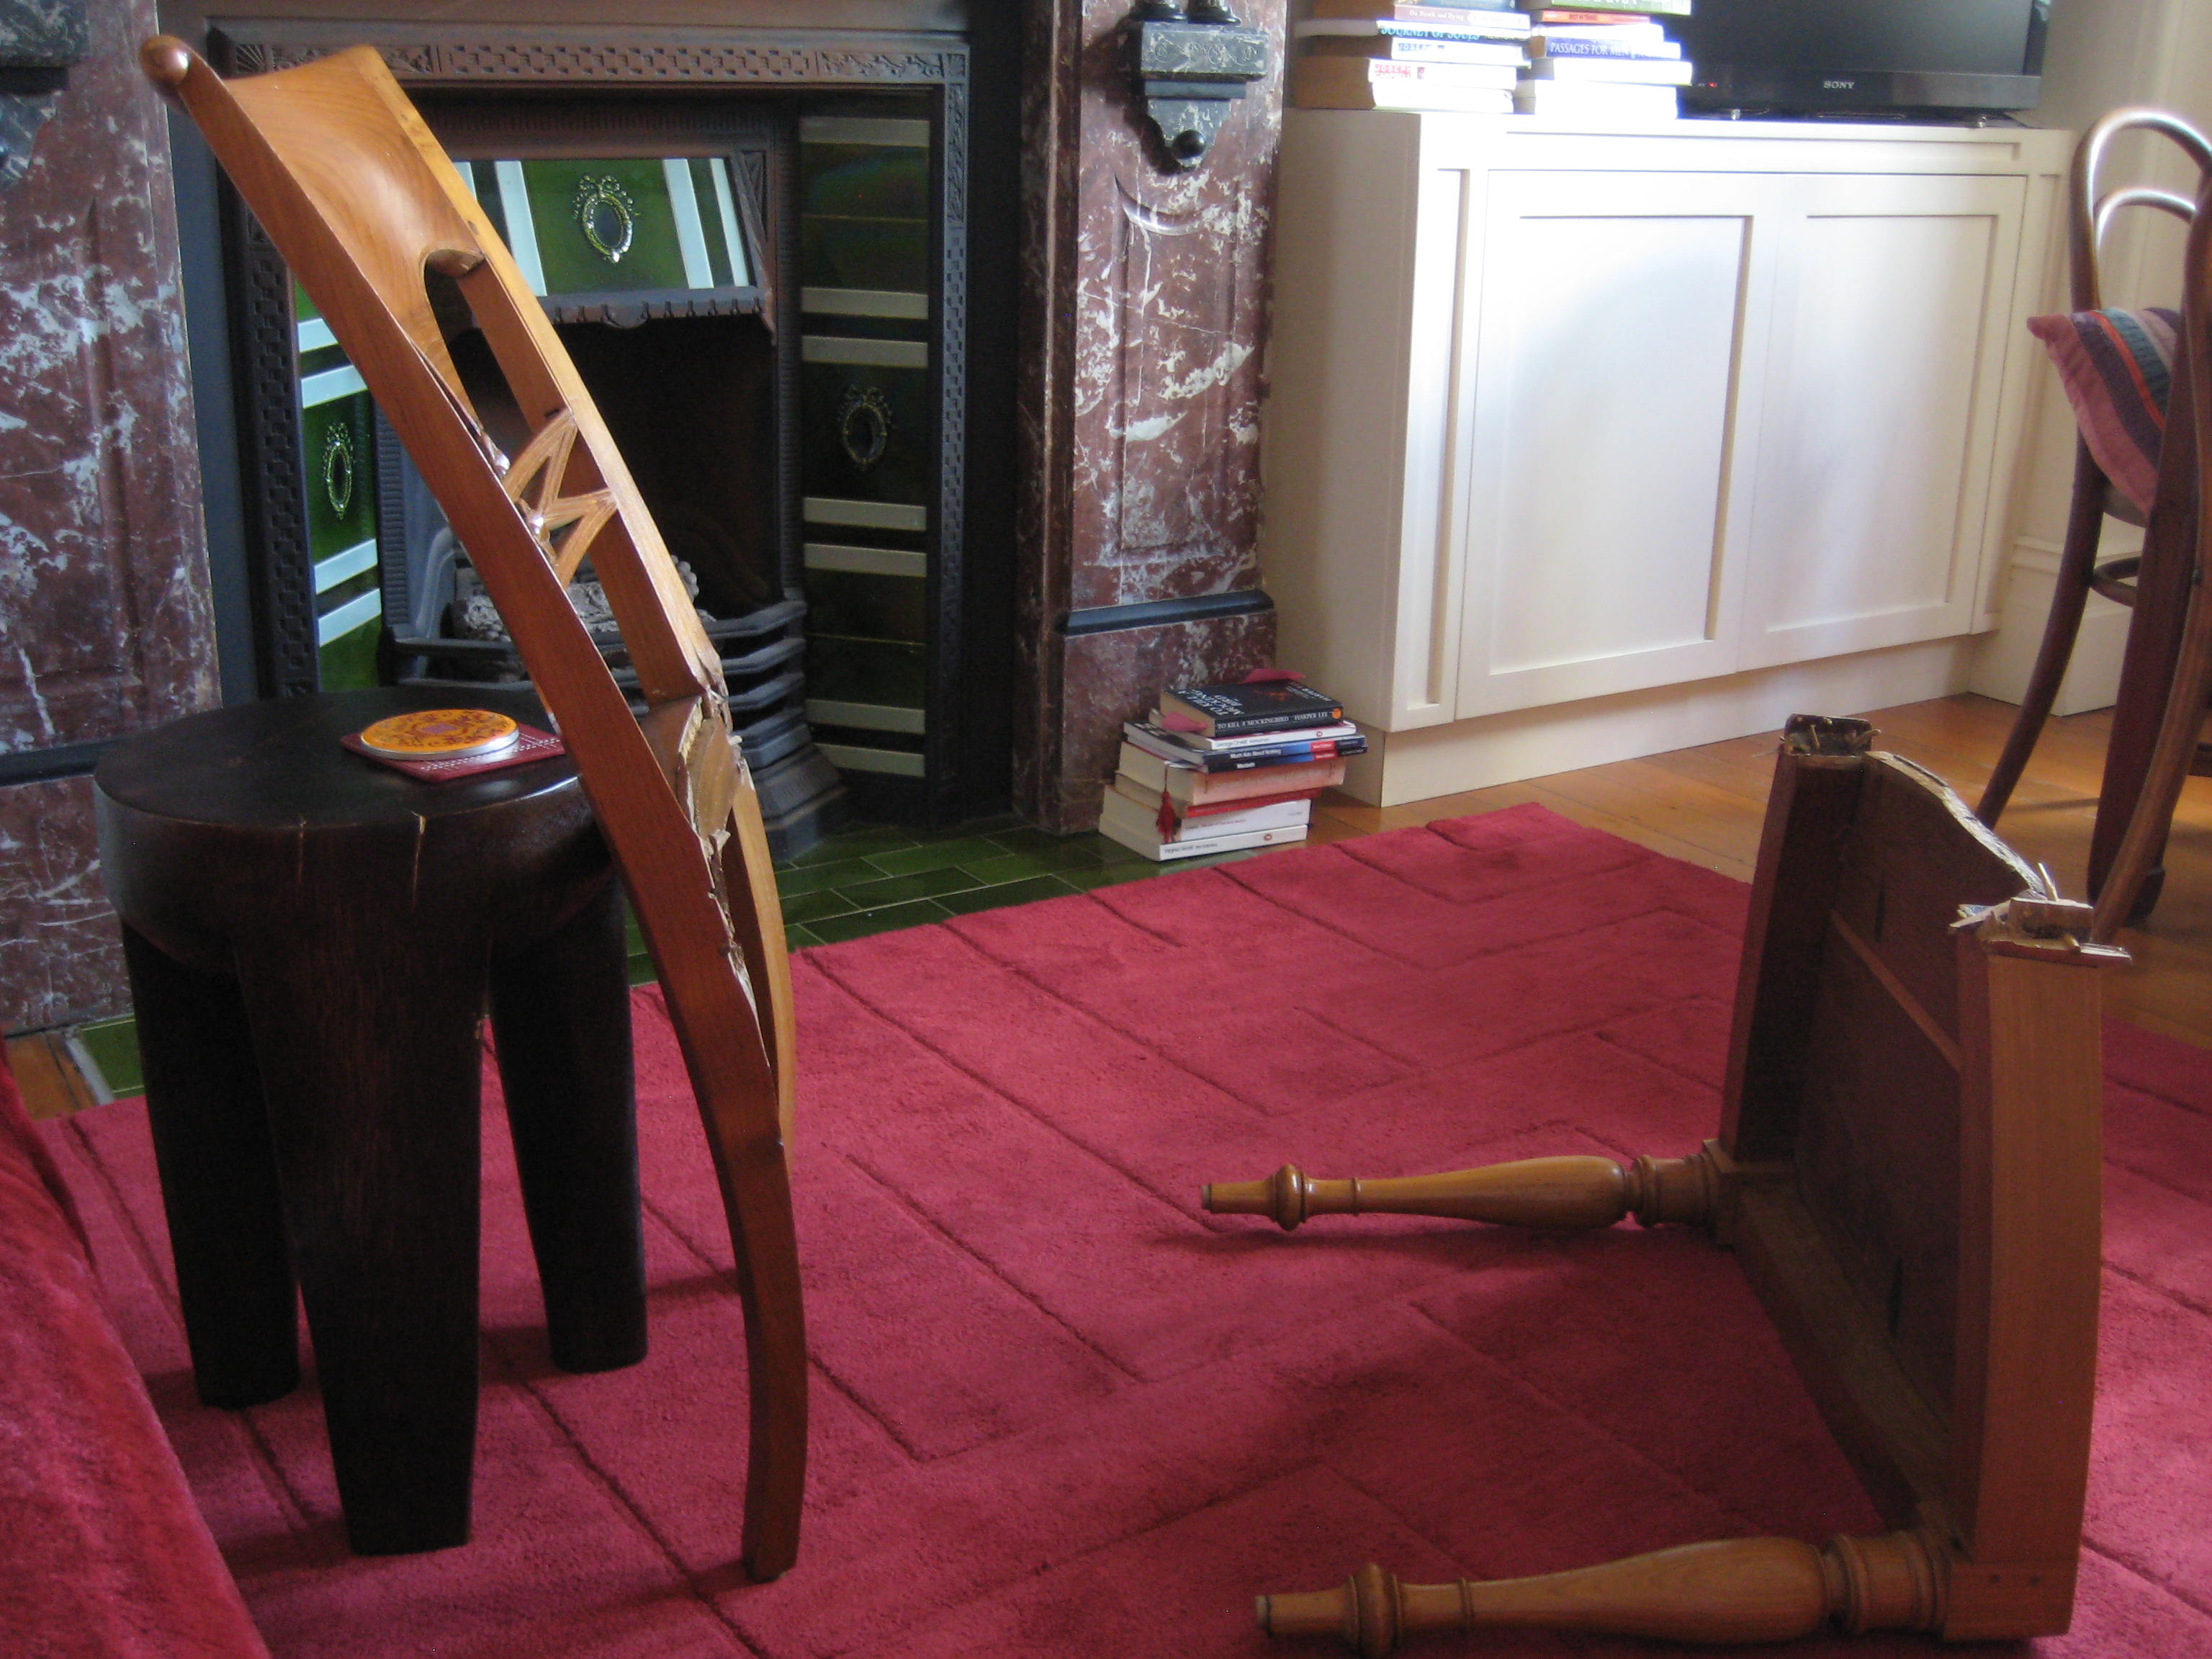 After a friend told me about the chair I said I would try to fix it for her. Time to put those lessons from Furnishing Finishing course into use.
First off all the old glue needed to be sanded or scraped off so the new glue would adhere. In a number of areas the snap wood needed to be taken off so it would fit together again. All joints were glued and clamped together.
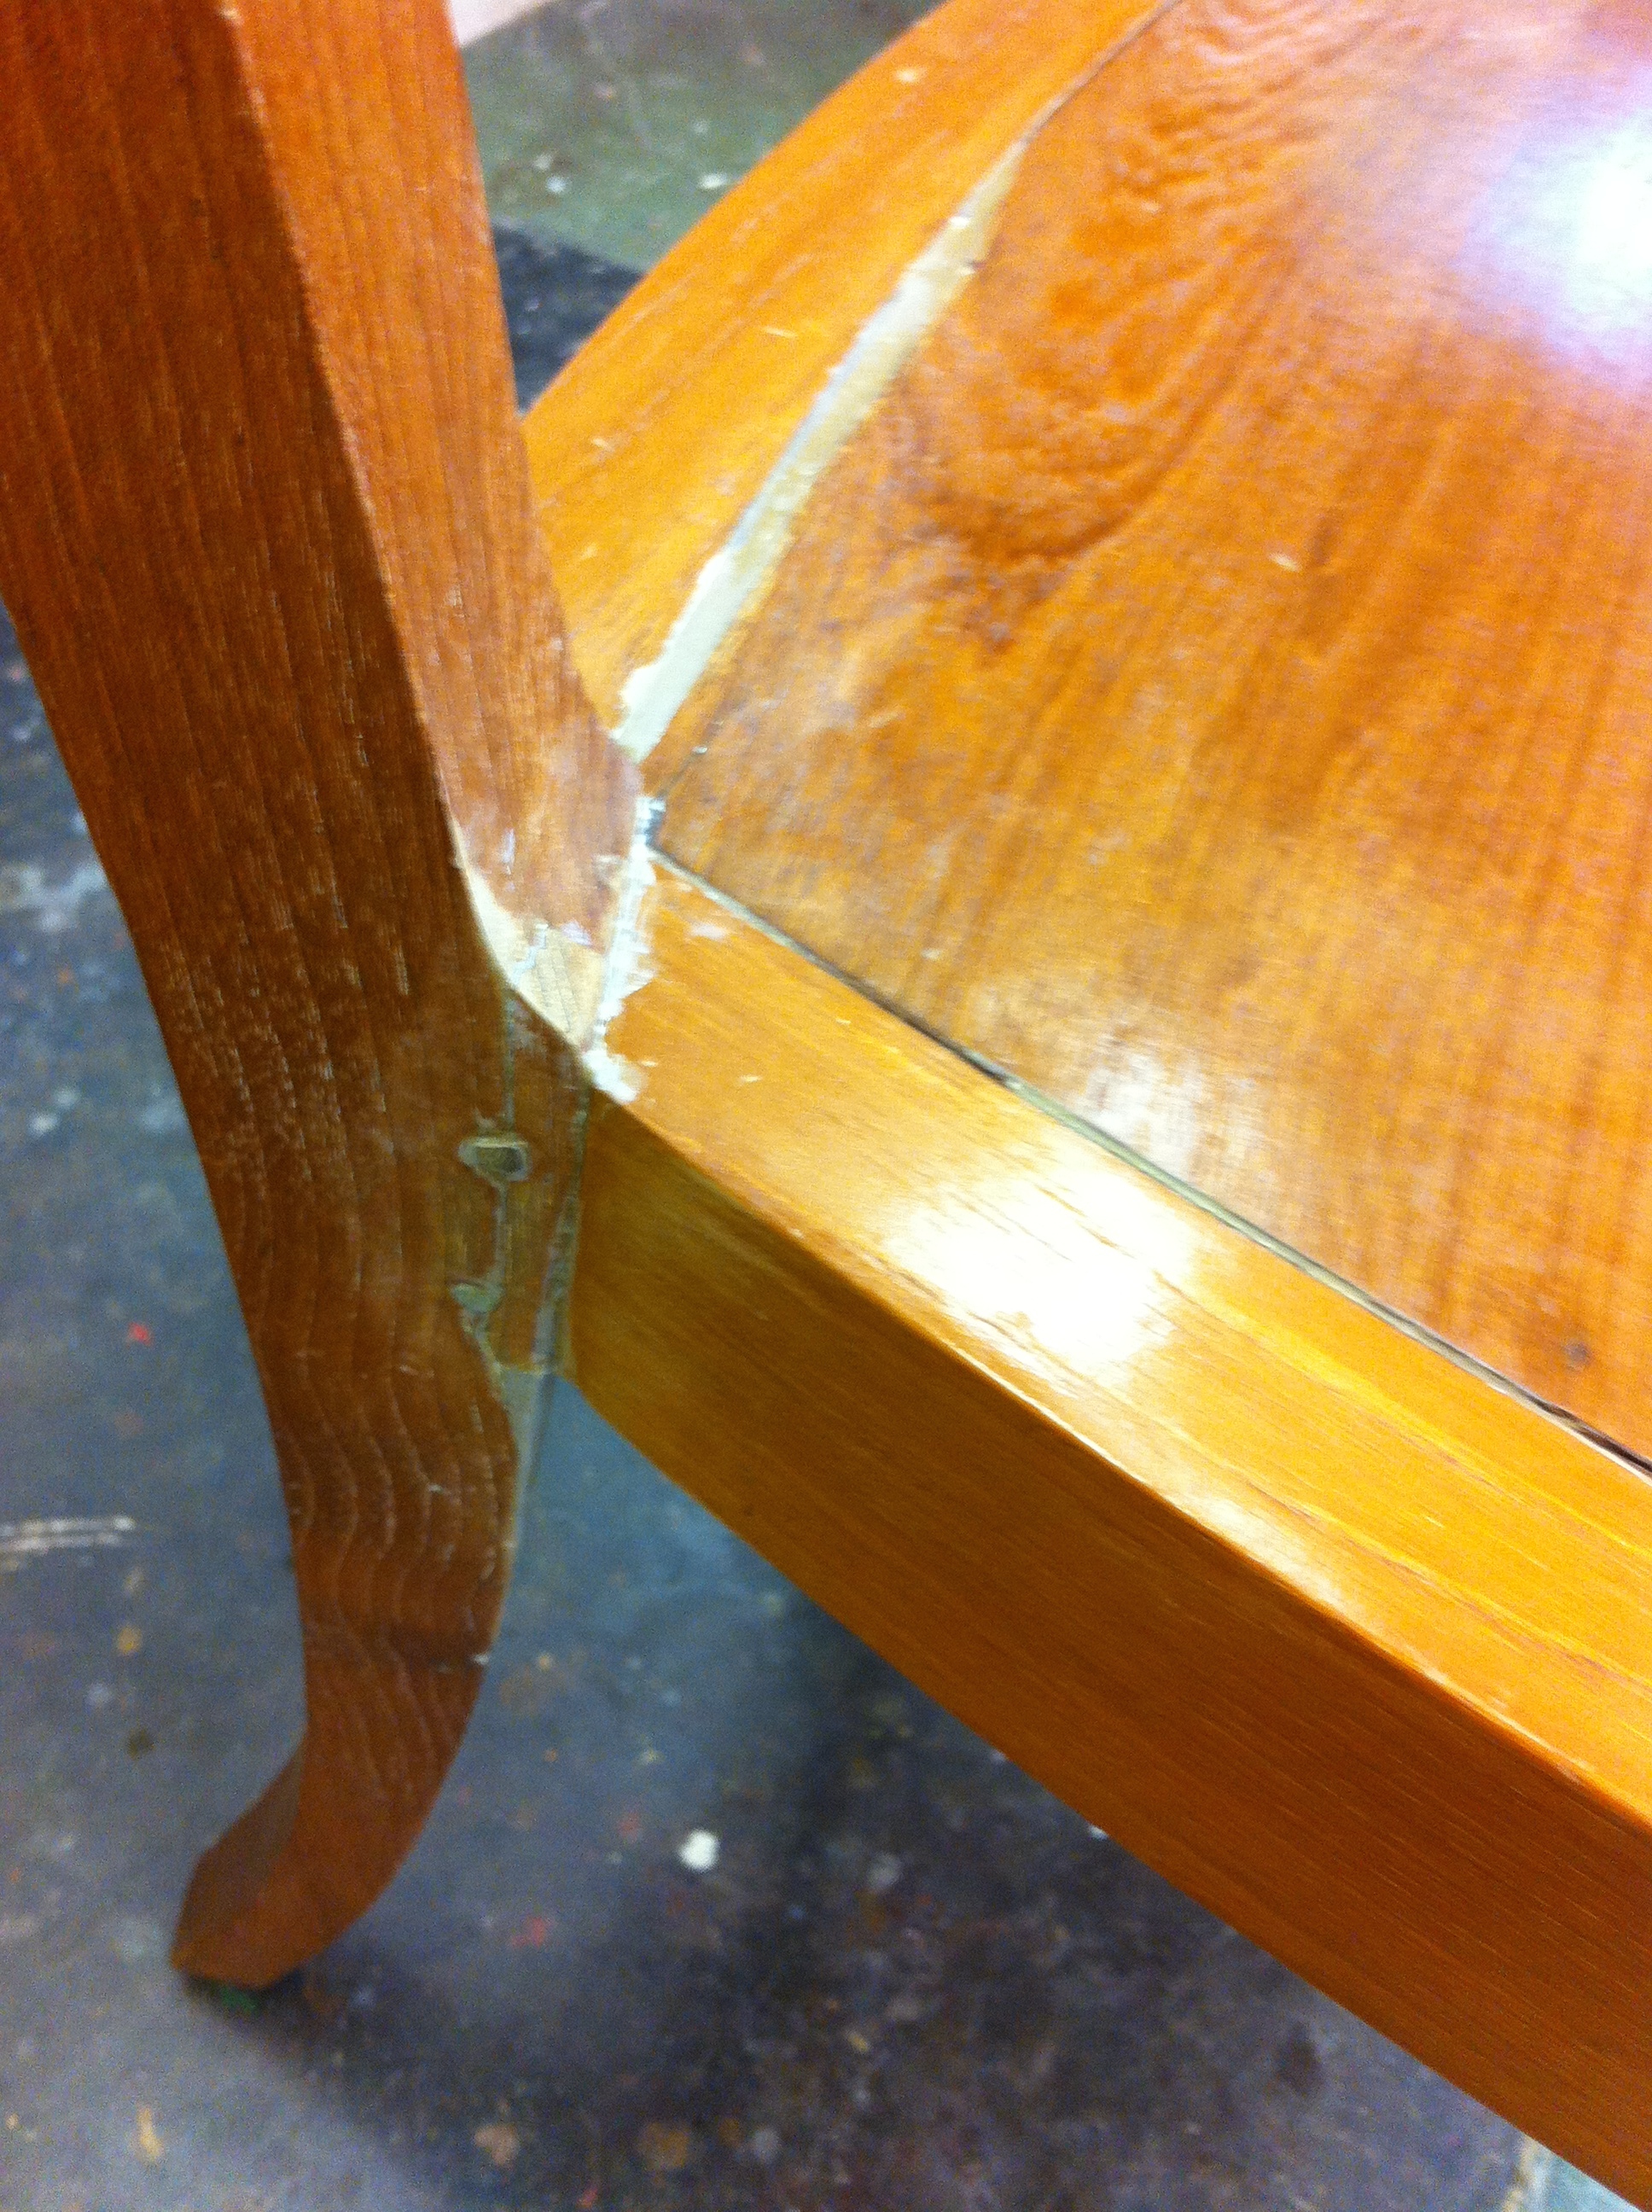
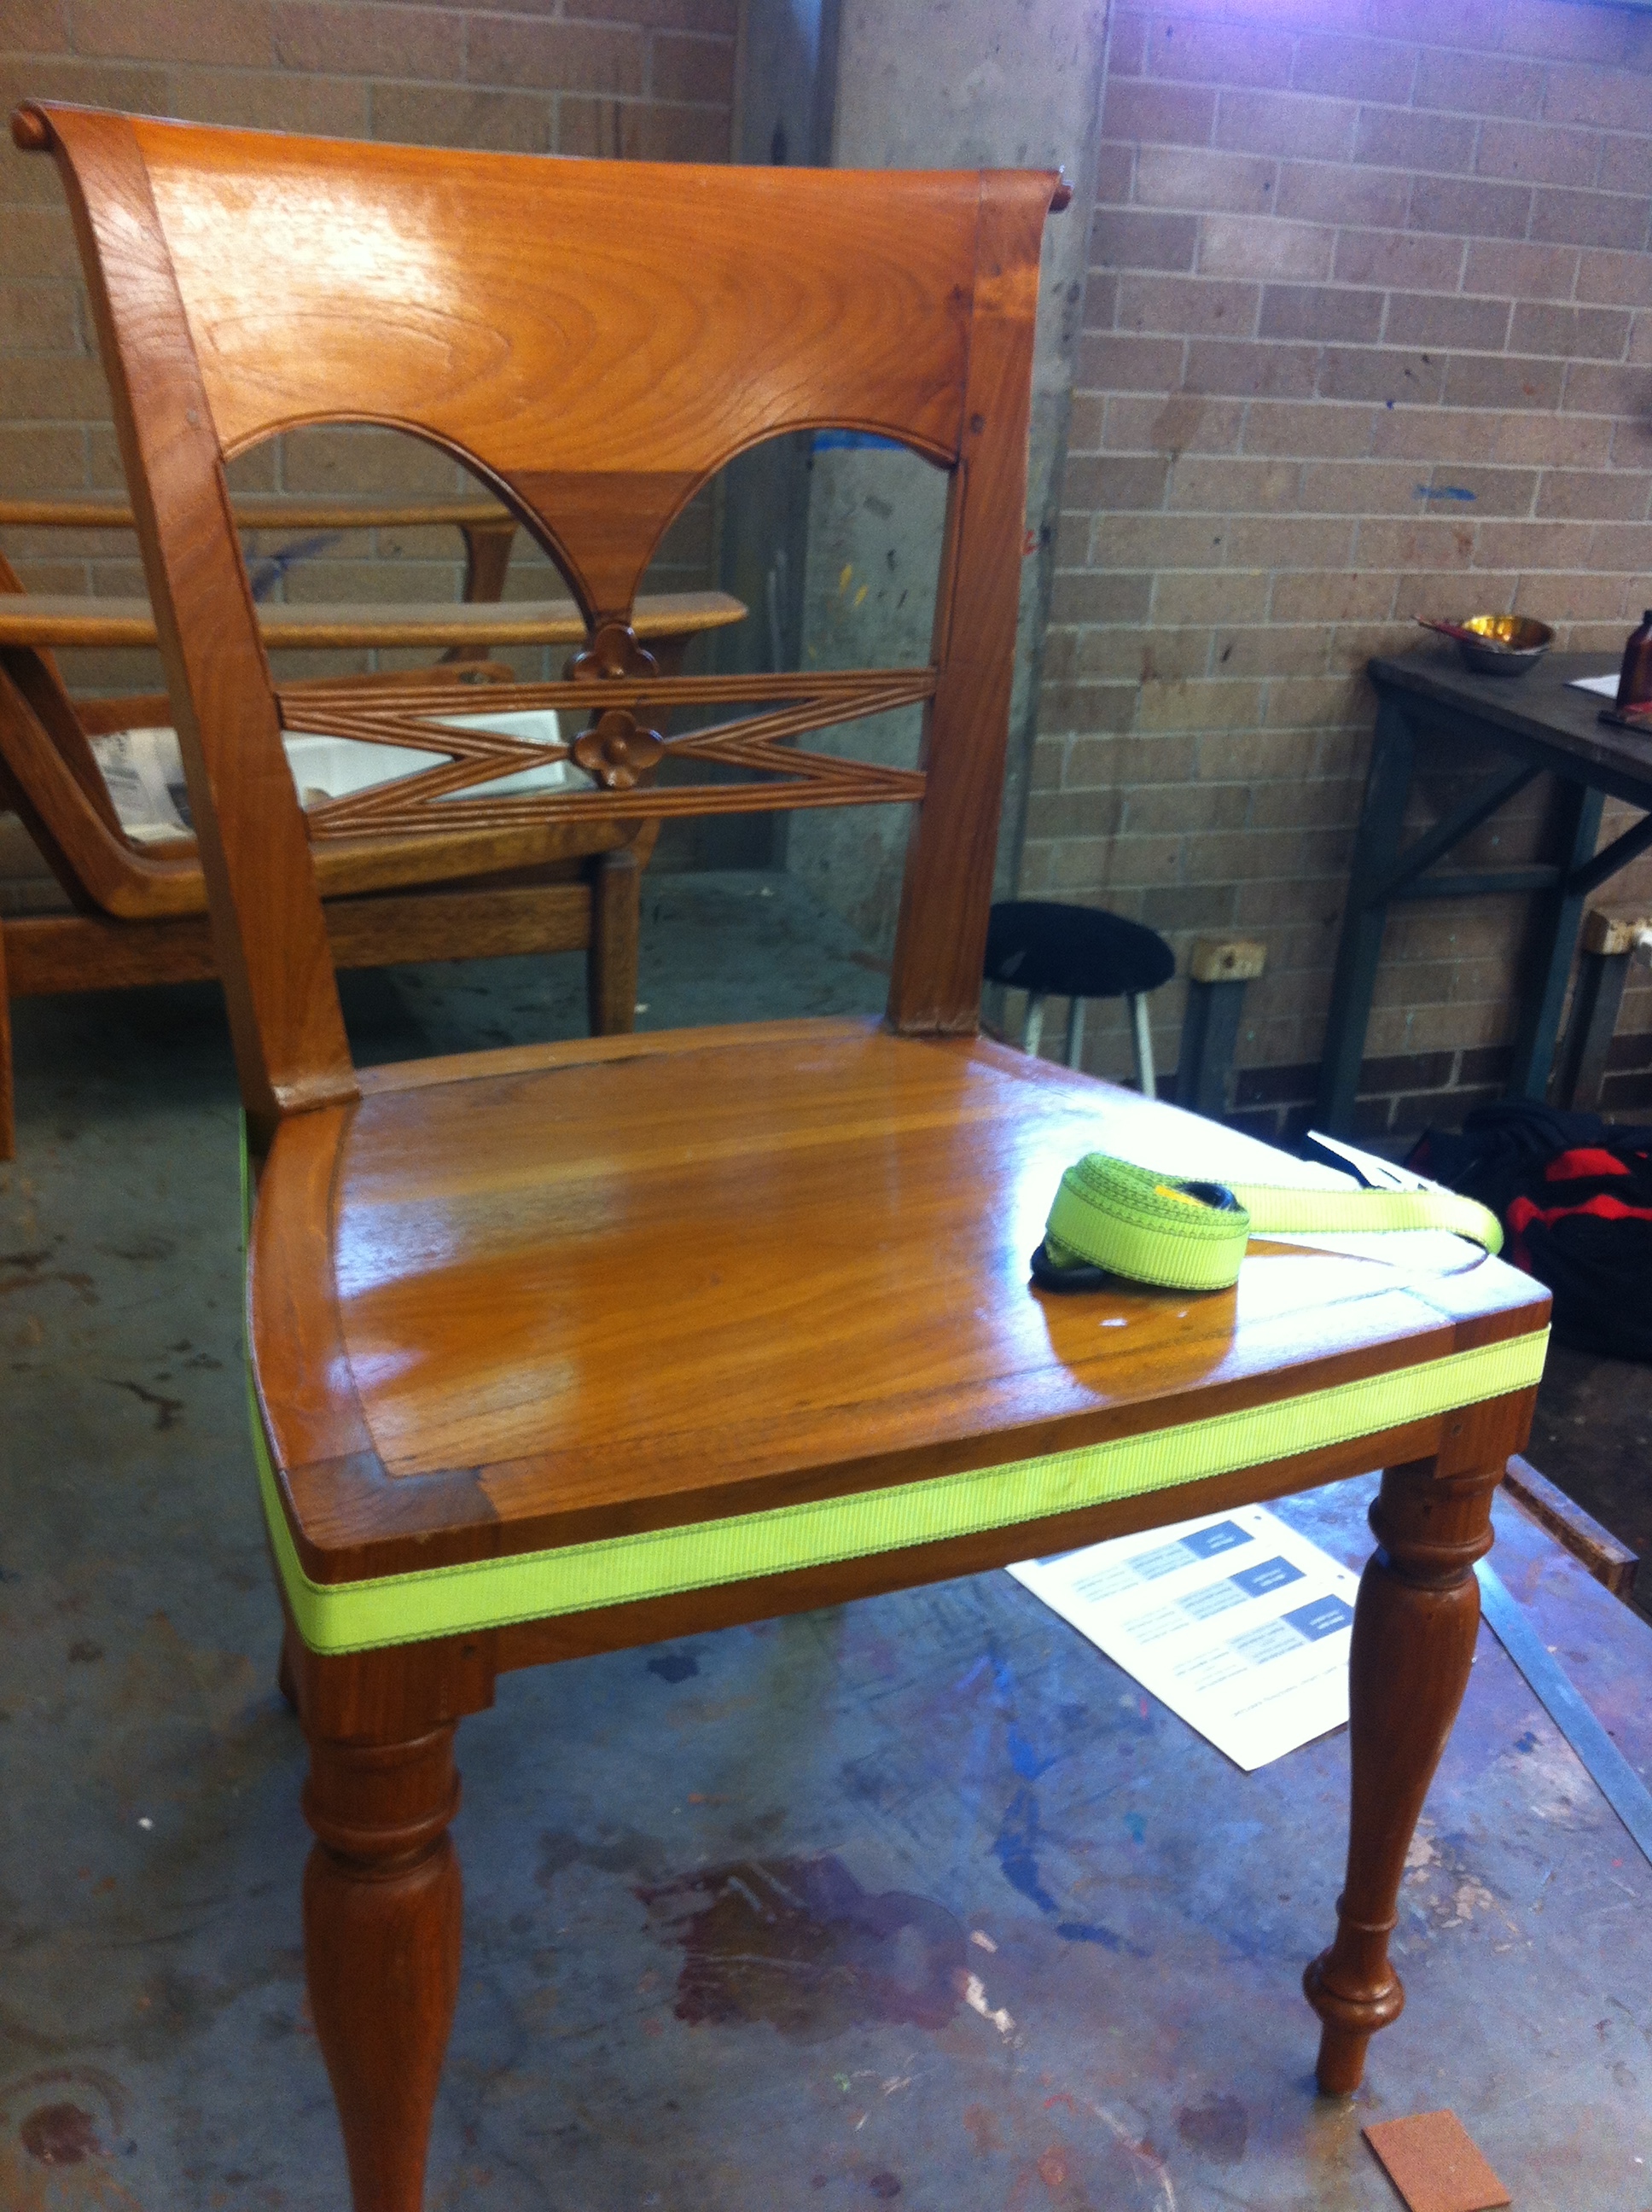 Once that job was done a fair amount of filling was required with epoxy. Once the epoxy was dried I sanded the areas back to smooth then it was the job of touching up all those areas to get the colour looking the same.

Done.
Whoops one more thing I added corner chocks underneath to give the back legs more strength – hopefully to save from another teenager rocking on the chair and snapping it.


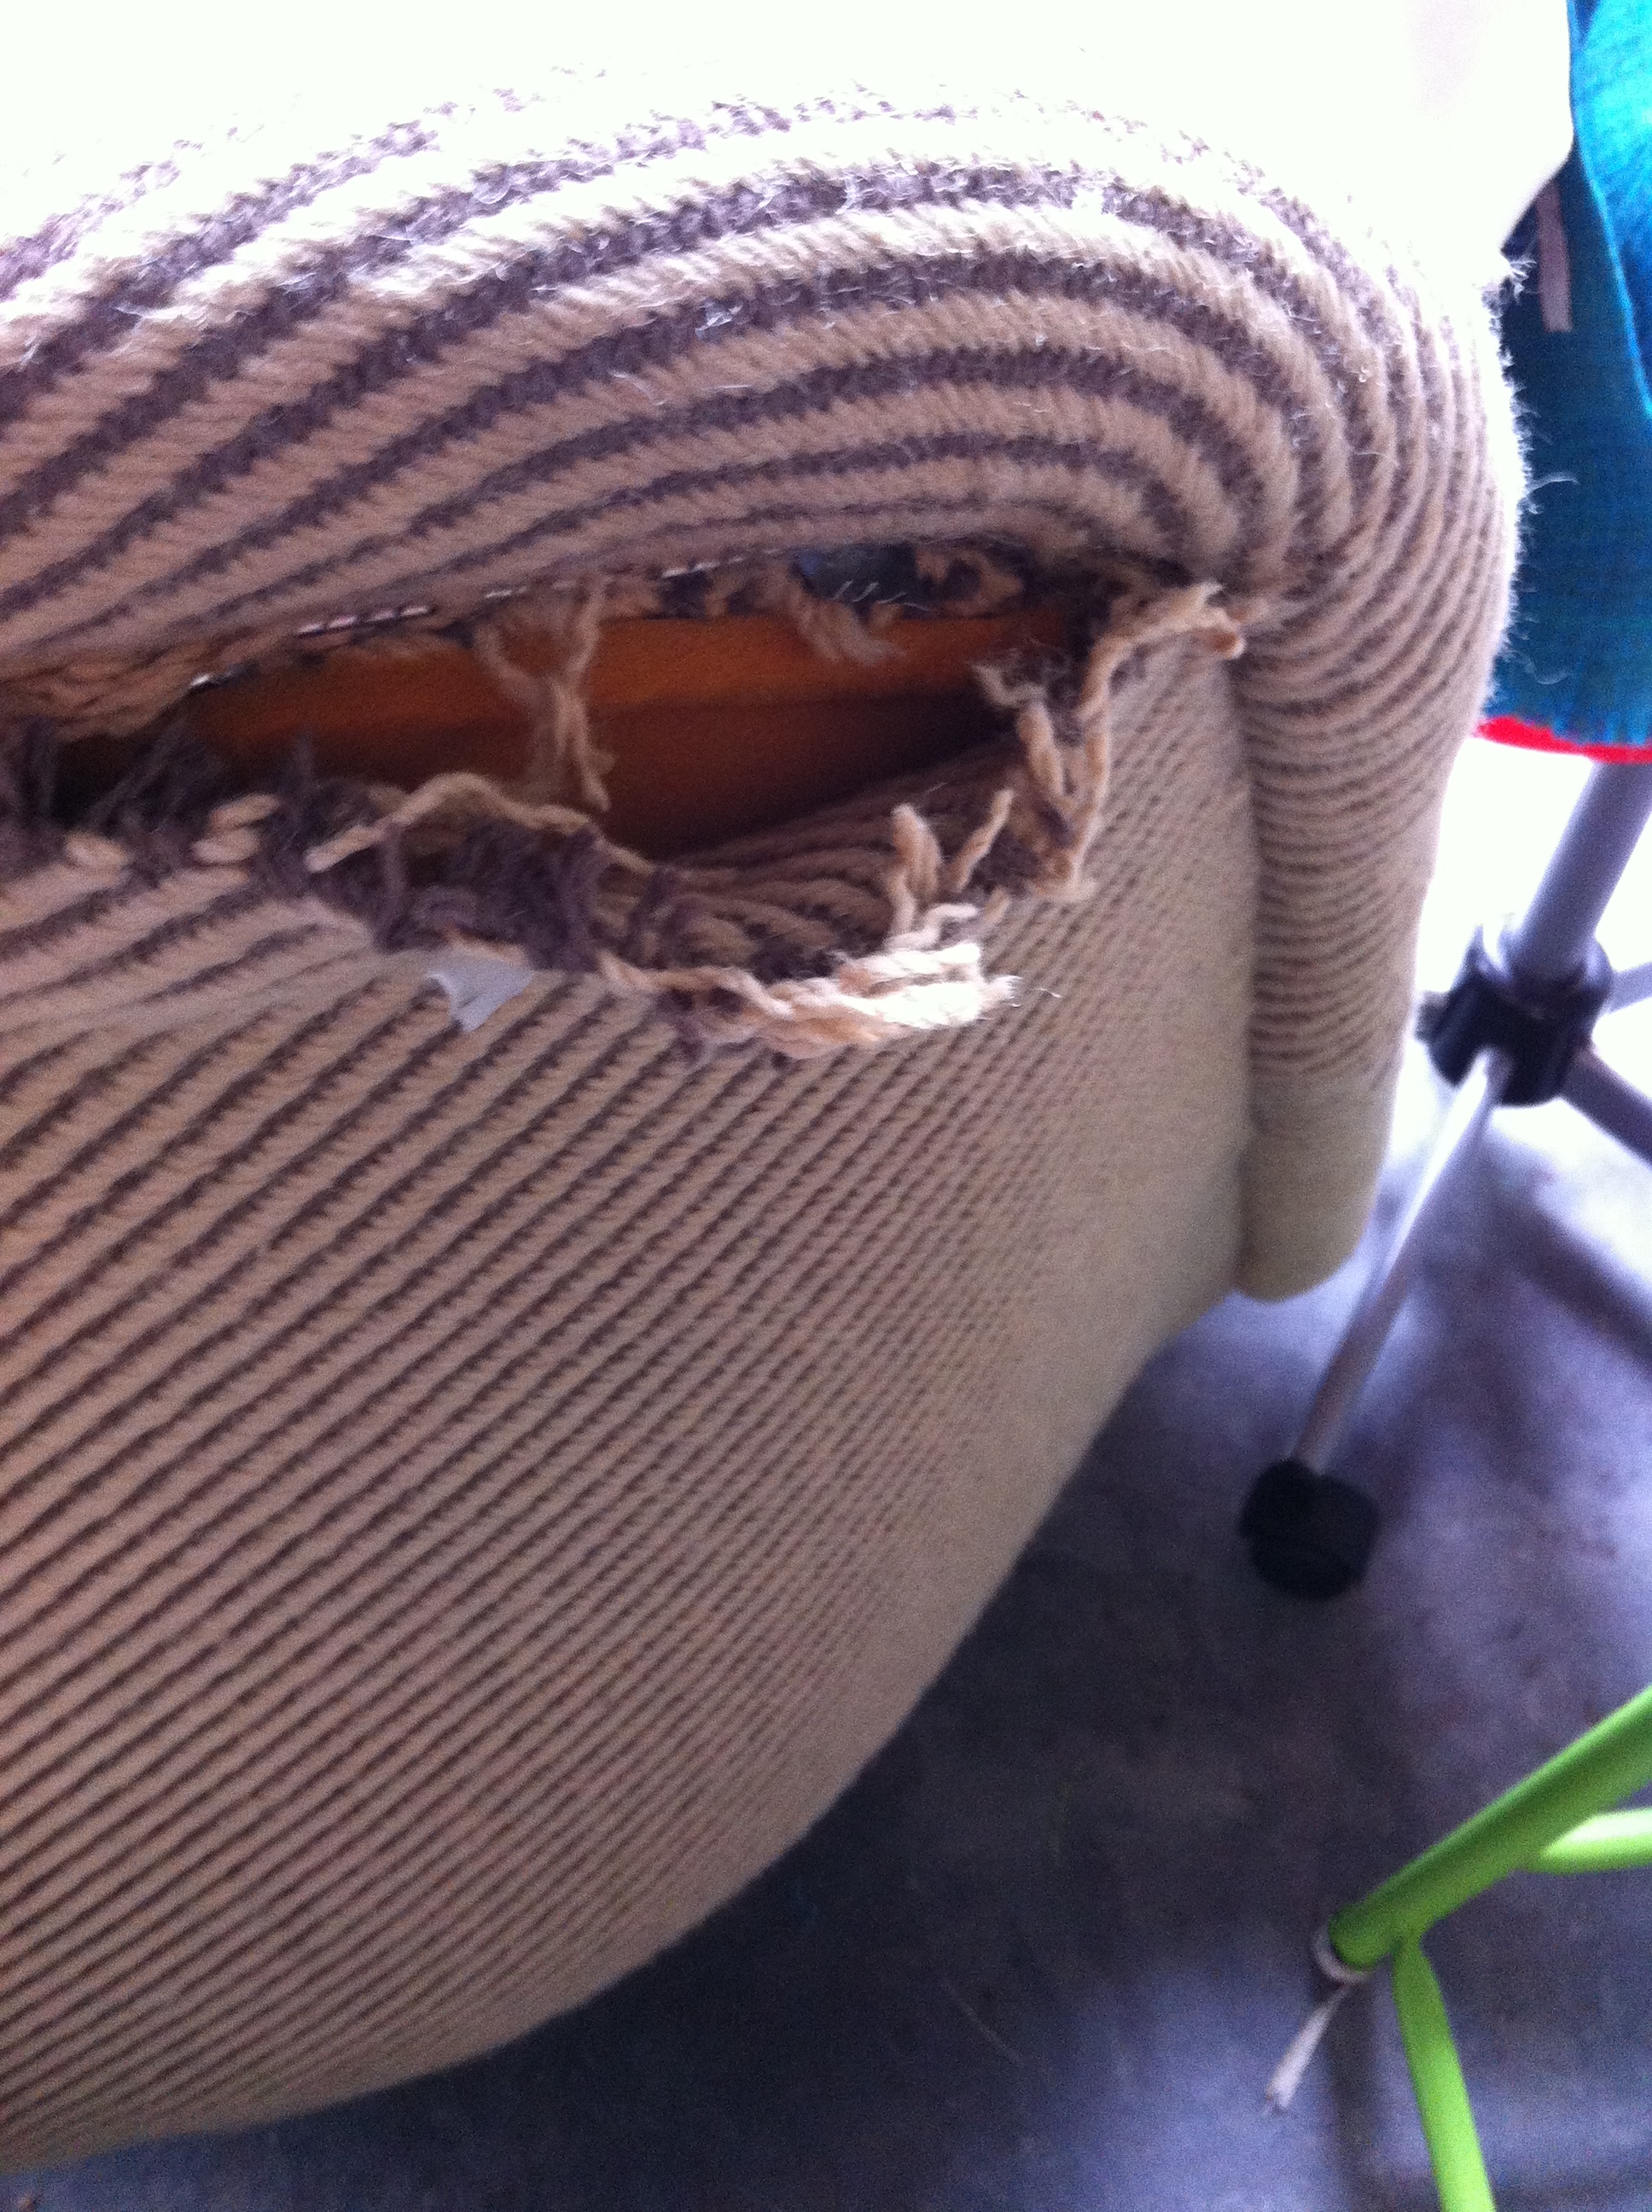
Ok we all have that chair that everybody in the family fights over – sometimes you are lucky and manage to get to it but after a while it more than looks a little lived in – Yep time for a revamp………..
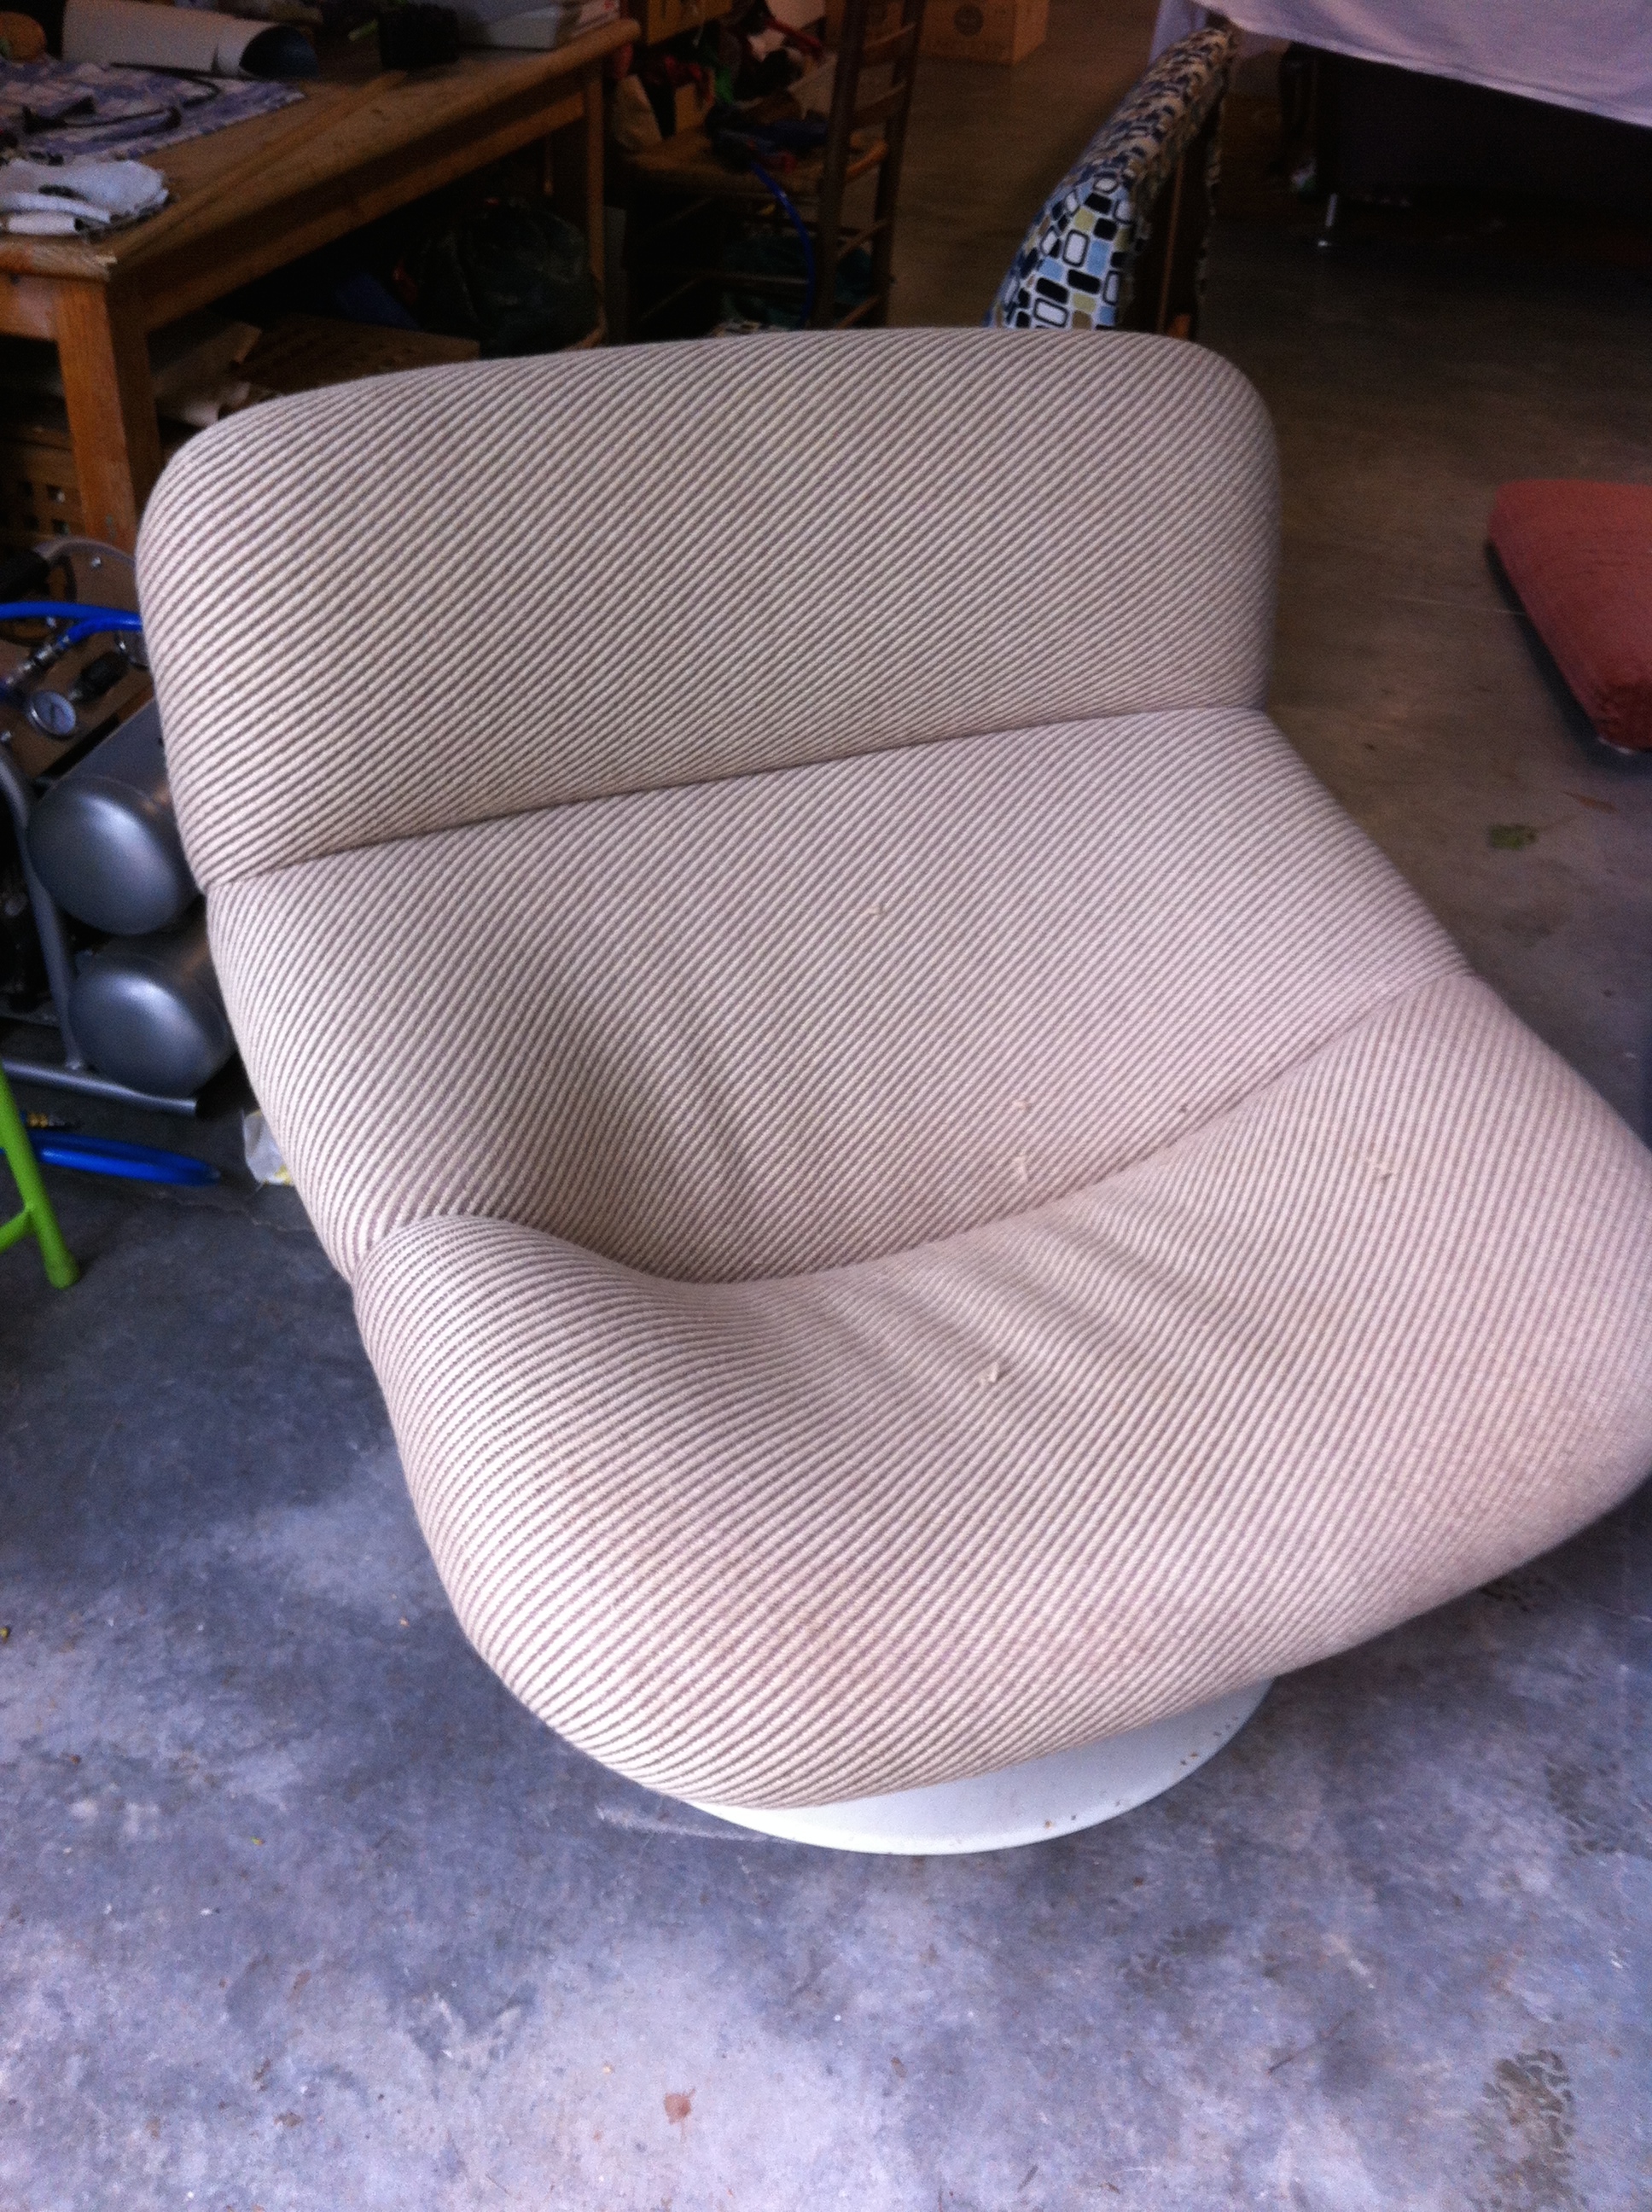
This chair is an original Artifort Lounge chair and was covered in a brown, beige stripe wool – time for a change.
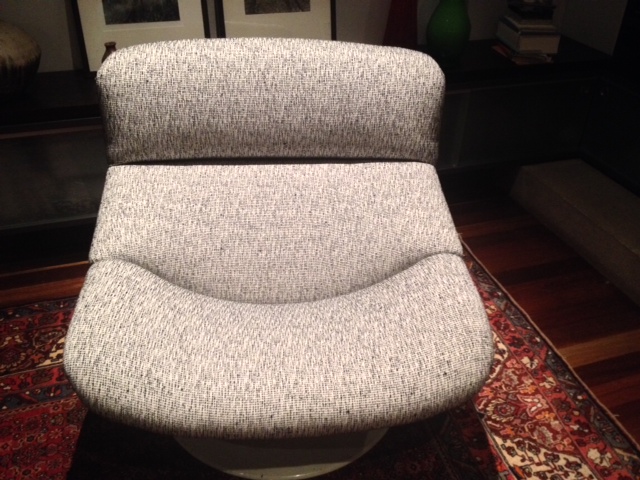

First off what material????? – in keeping with the original it had to be a wool – the client chose a fantastic wool fabric from Instyle – design ‘Mammoth’, colour ‘Decision’.
The Artifort Lounge chair has to be one of the most comfortable chairs there is and was a joy to recover.
Working with a top quality fabric makes all the difference.

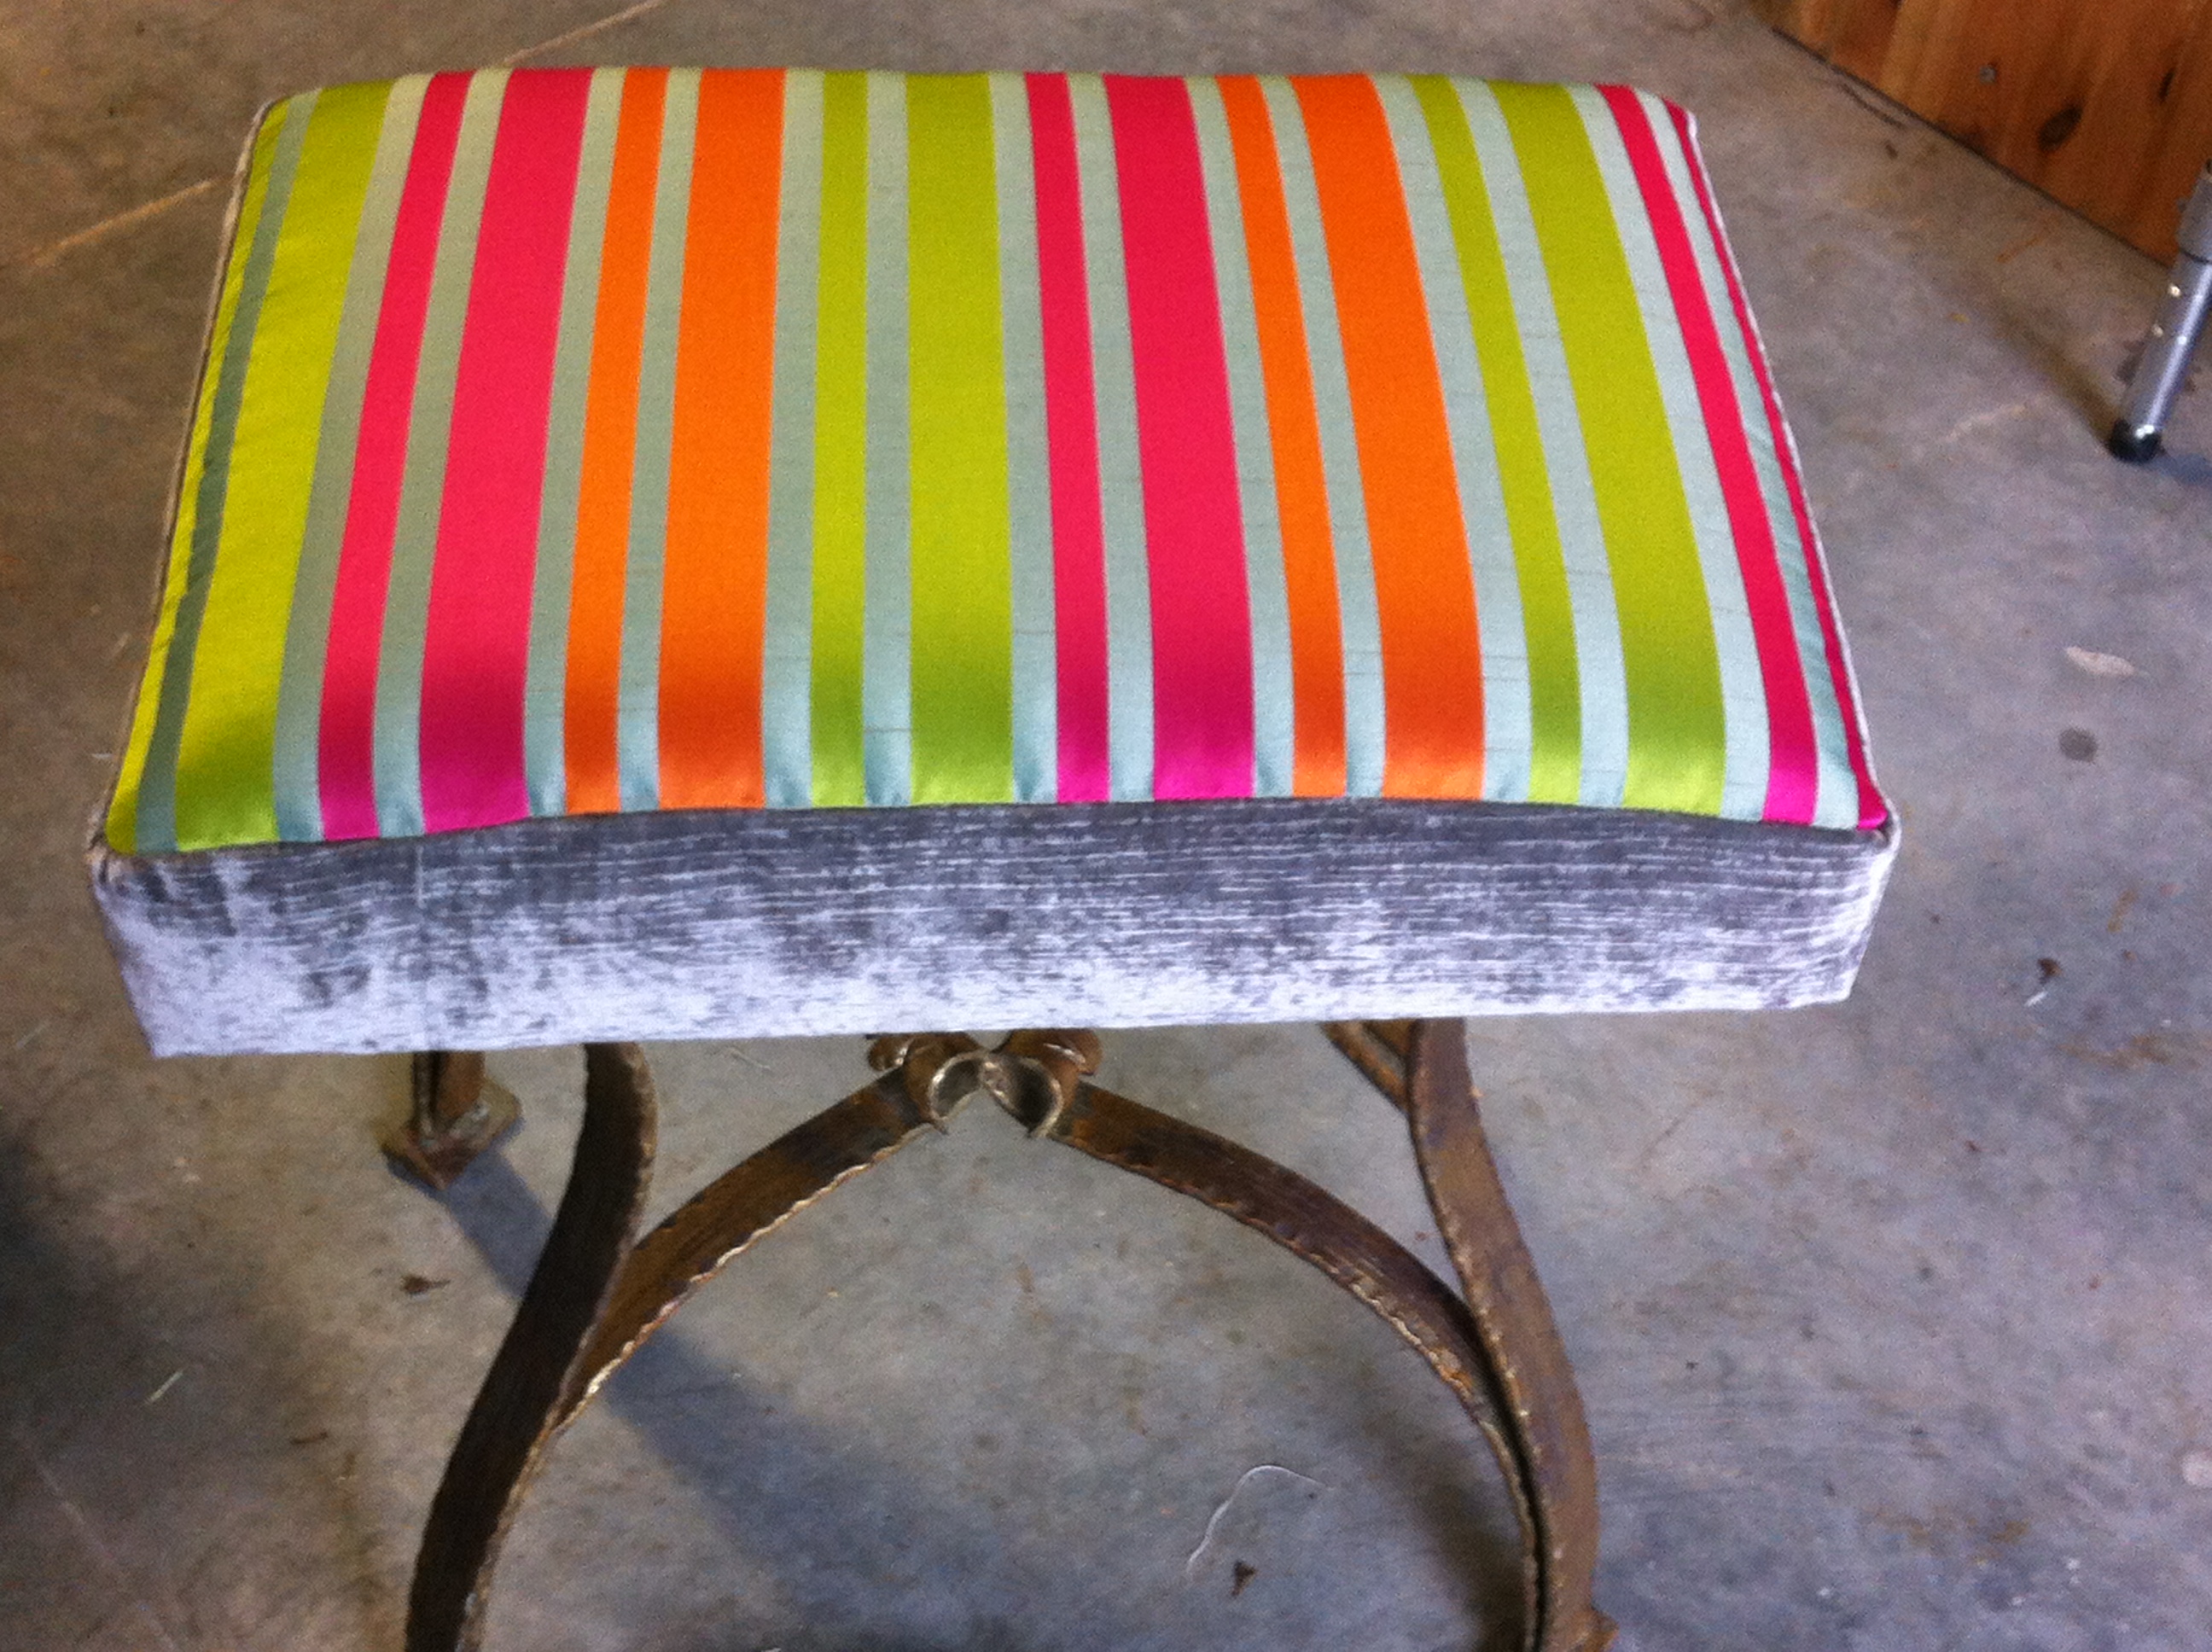
I found this material a while ago and have just been waiting for the right project to use it.
Yes – the colours are a bit out there, but I think they are fun, lively and will brighten up a bedroom, giving it a pop of colour.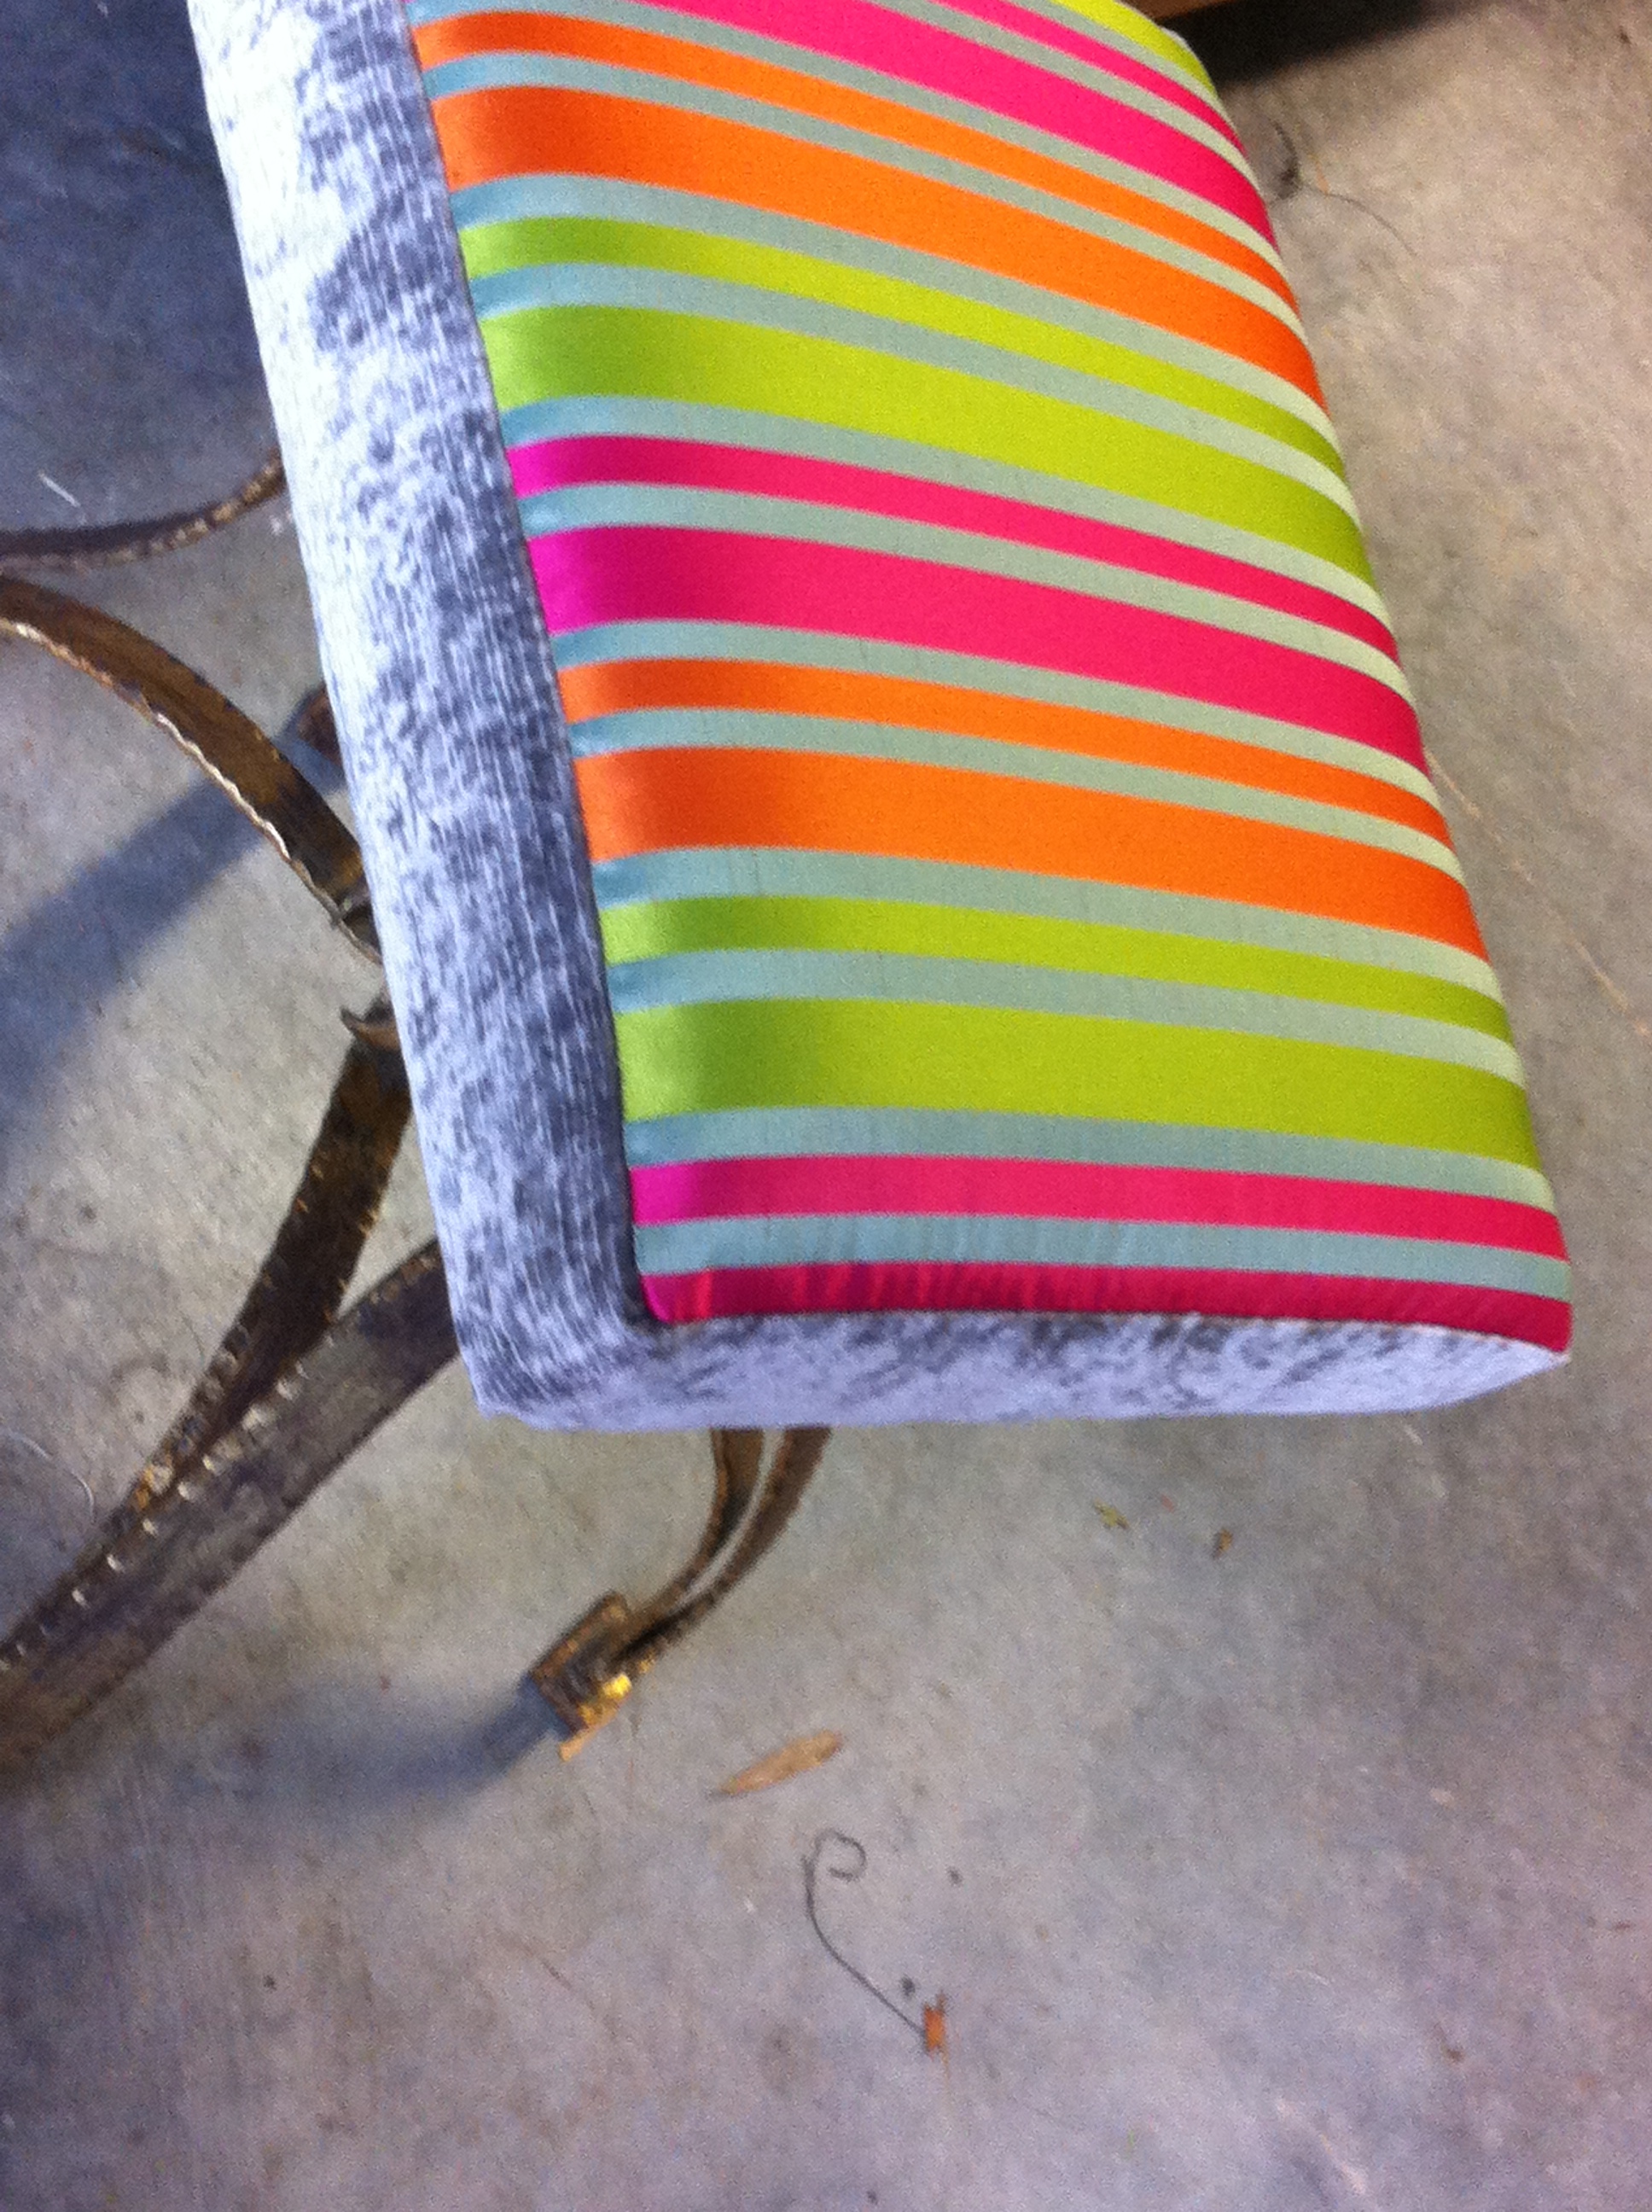

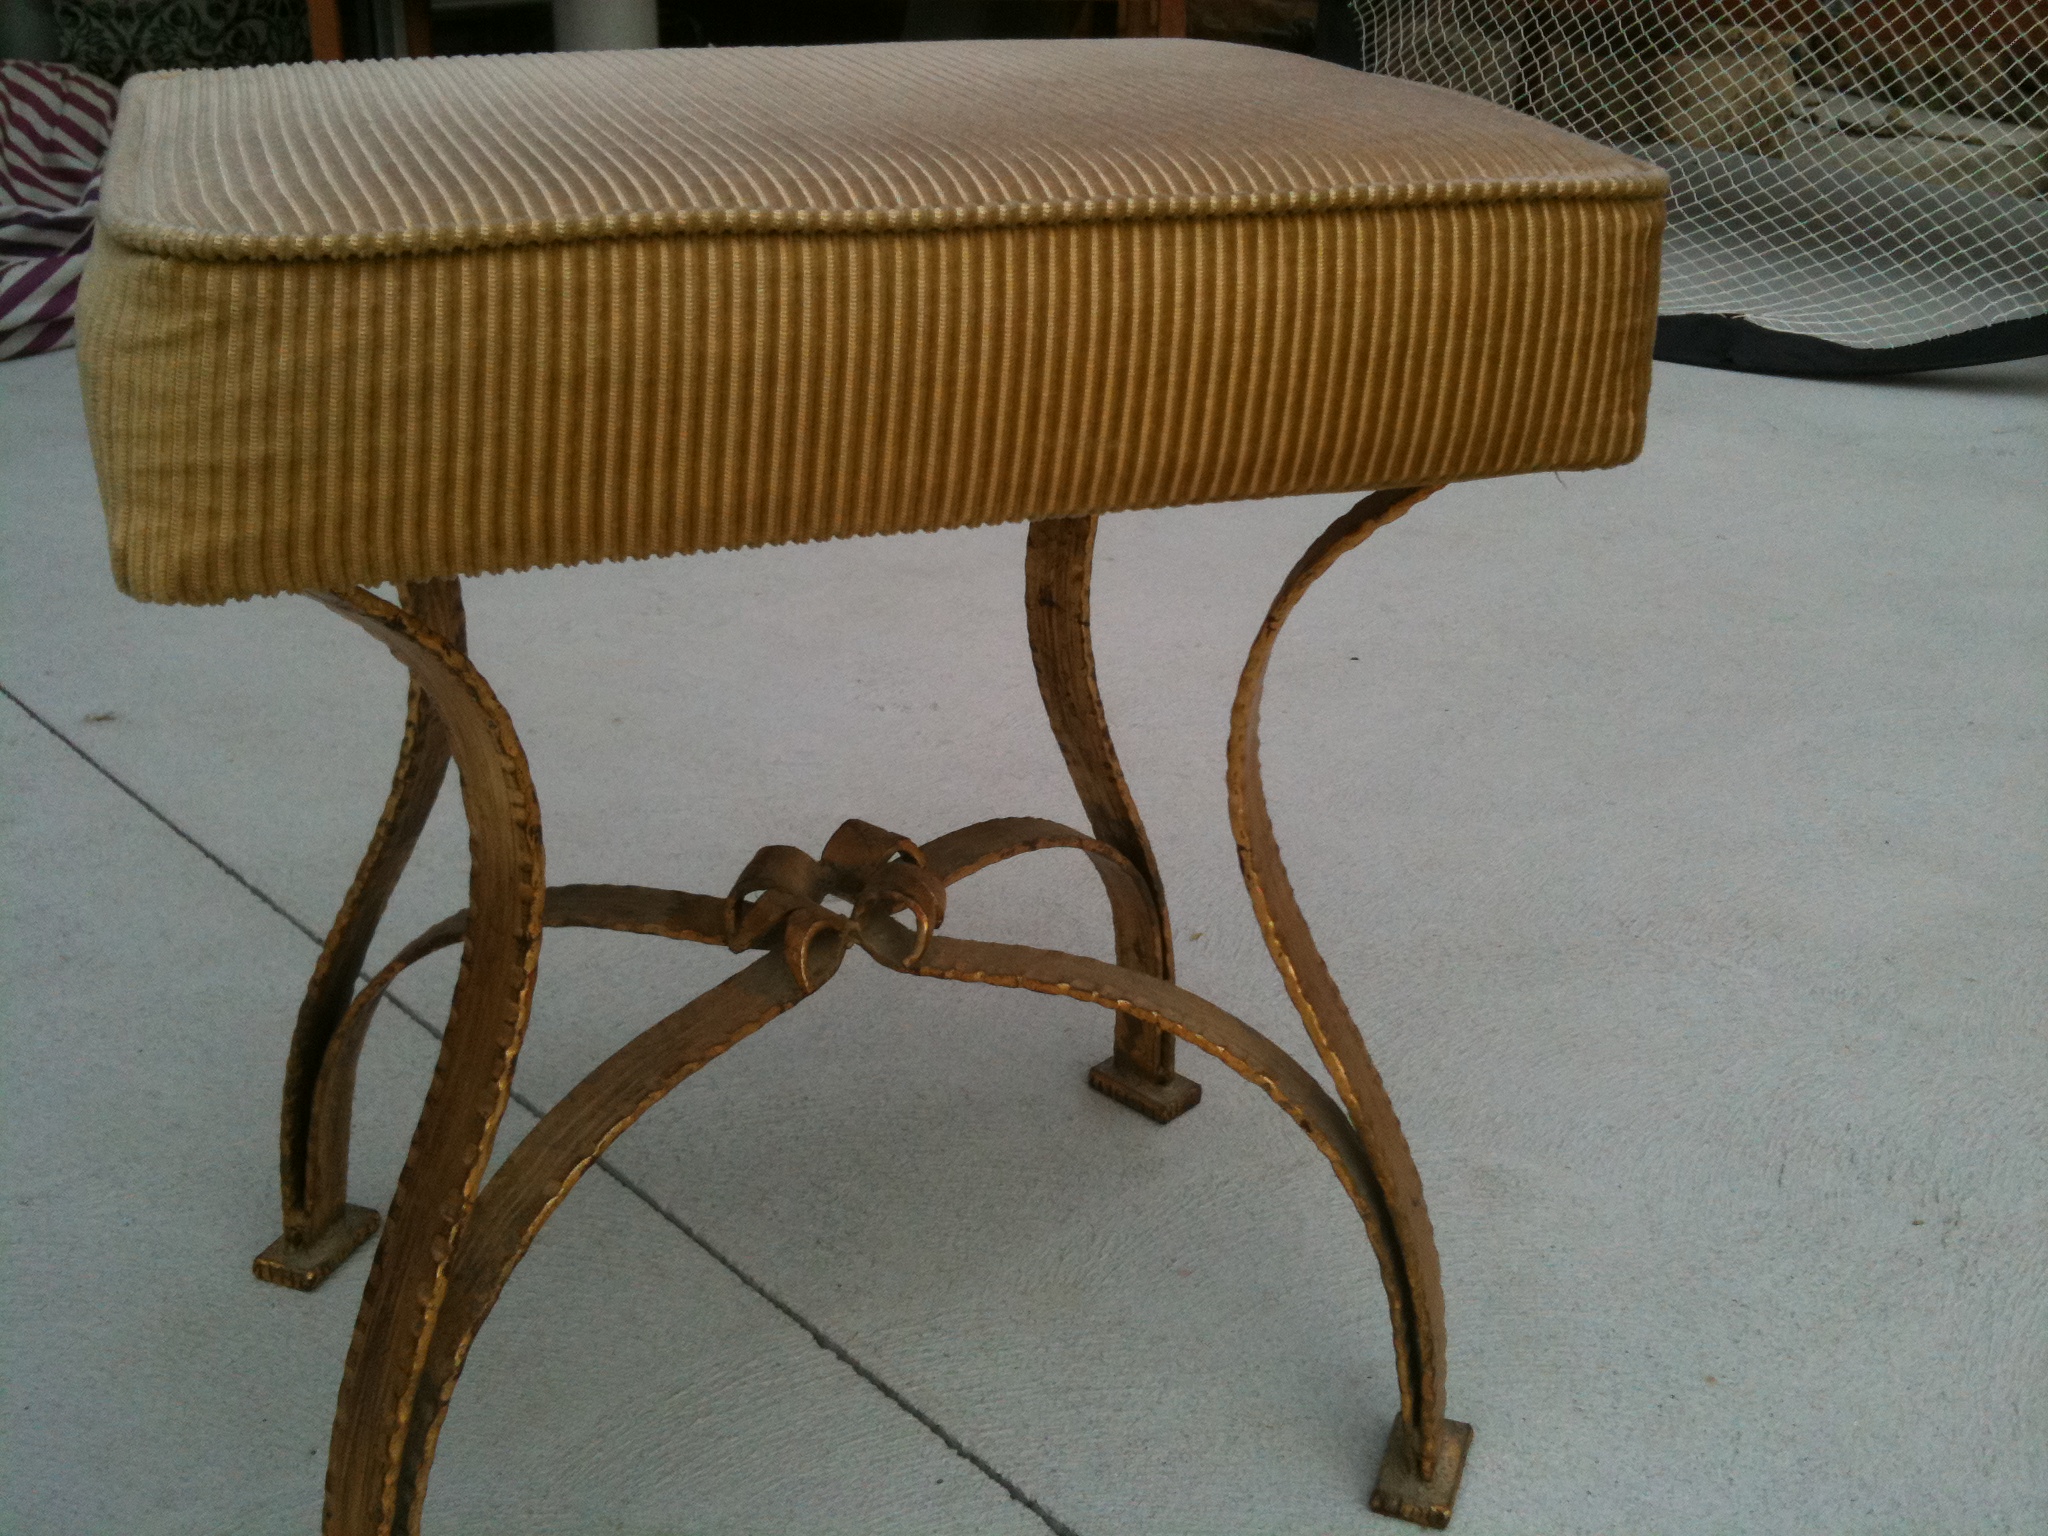
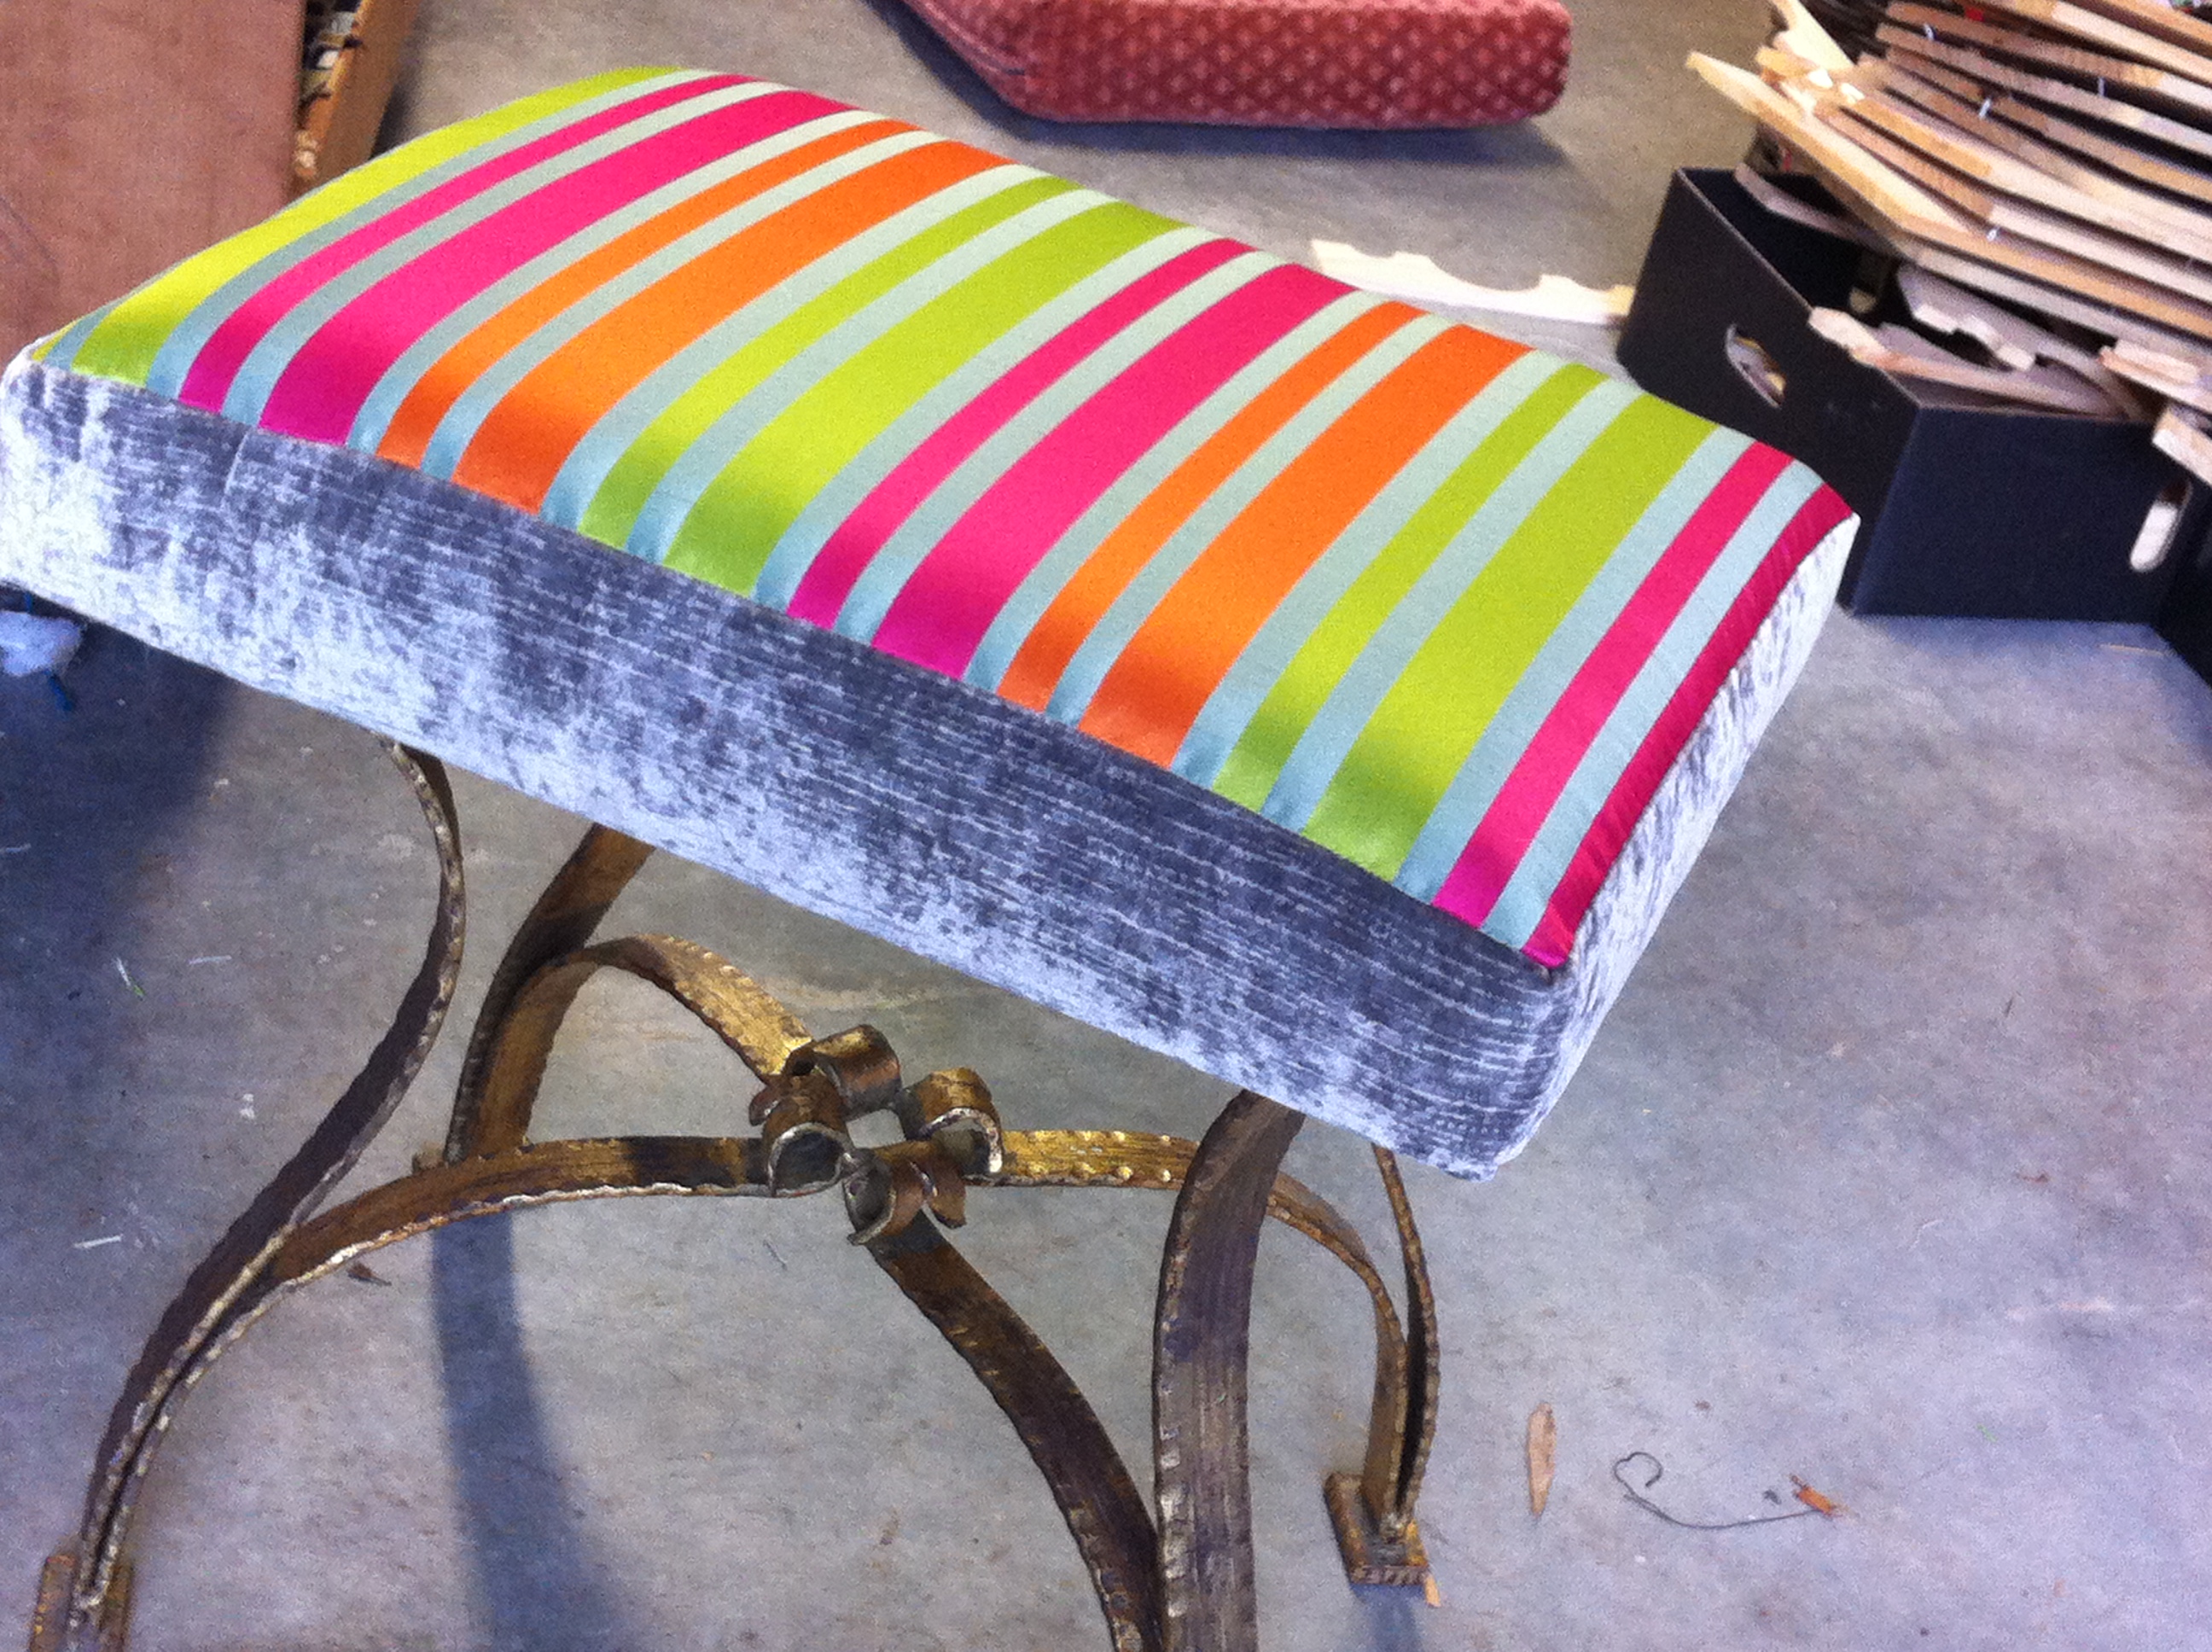
The old stool definitely needed a makeover.
Now to decided whether to change the colour of the stool to an antique silver black or just leave it. Will have a think, in the mean time I may make some cushions with the grey velvet and stripe.
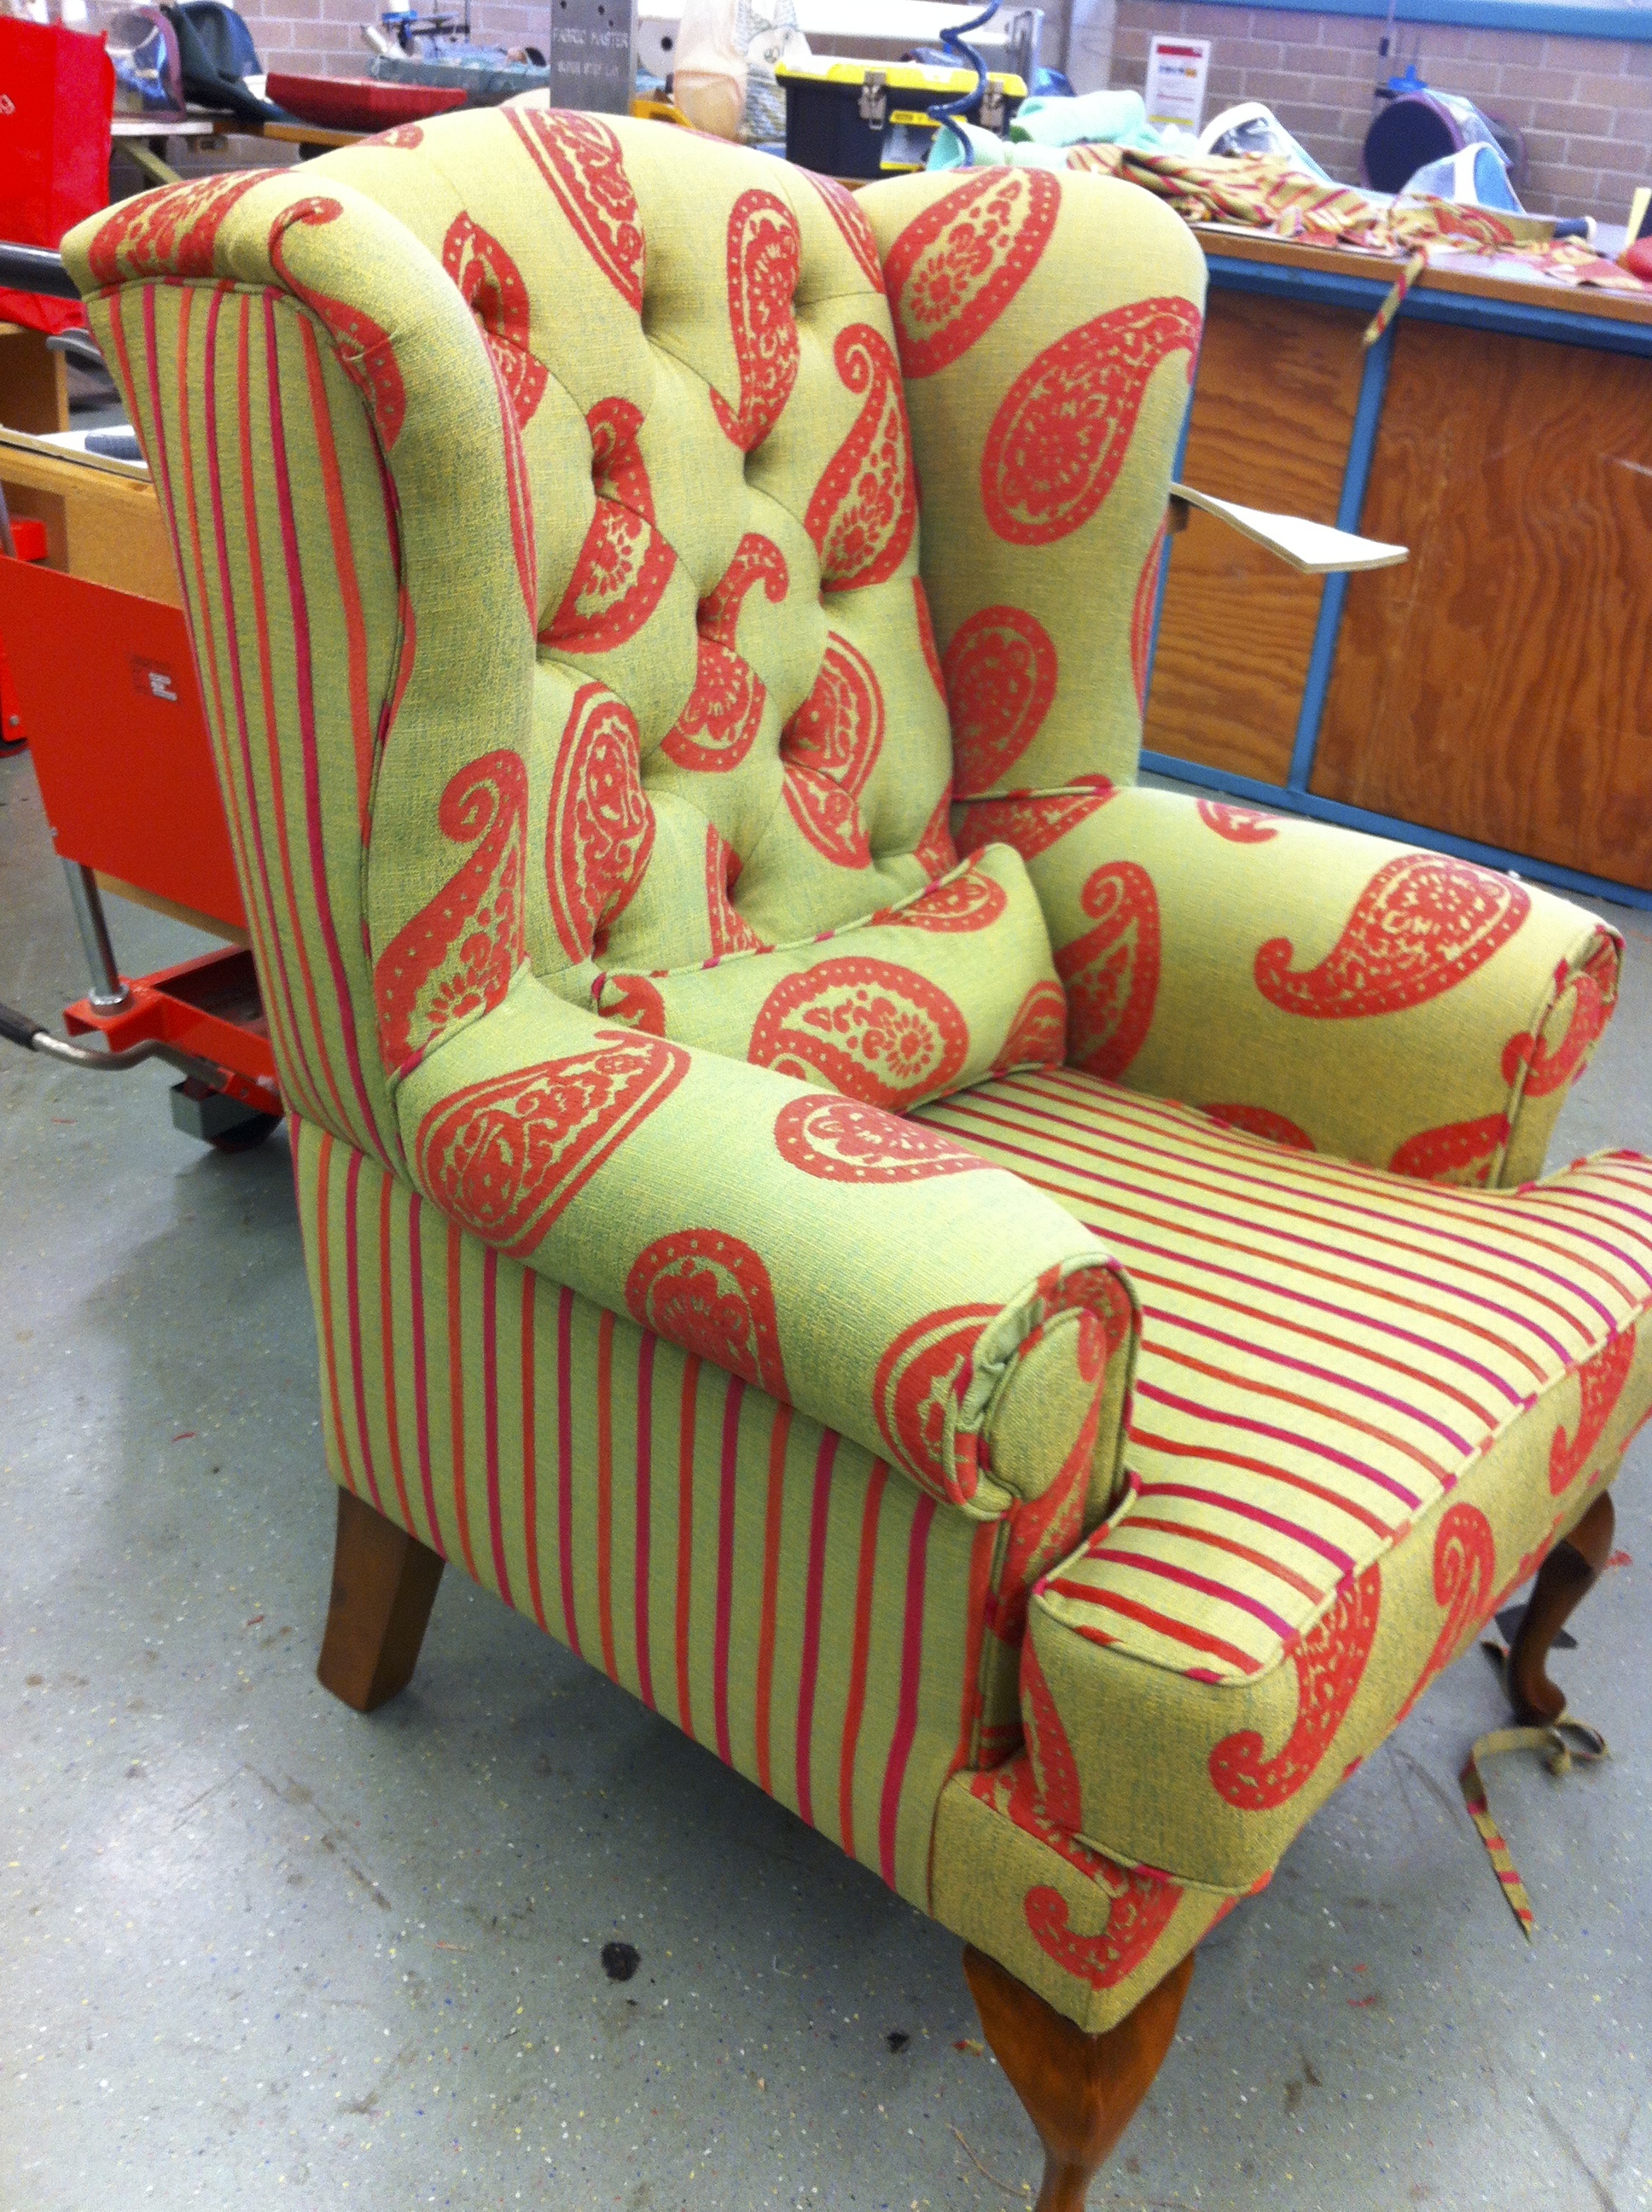
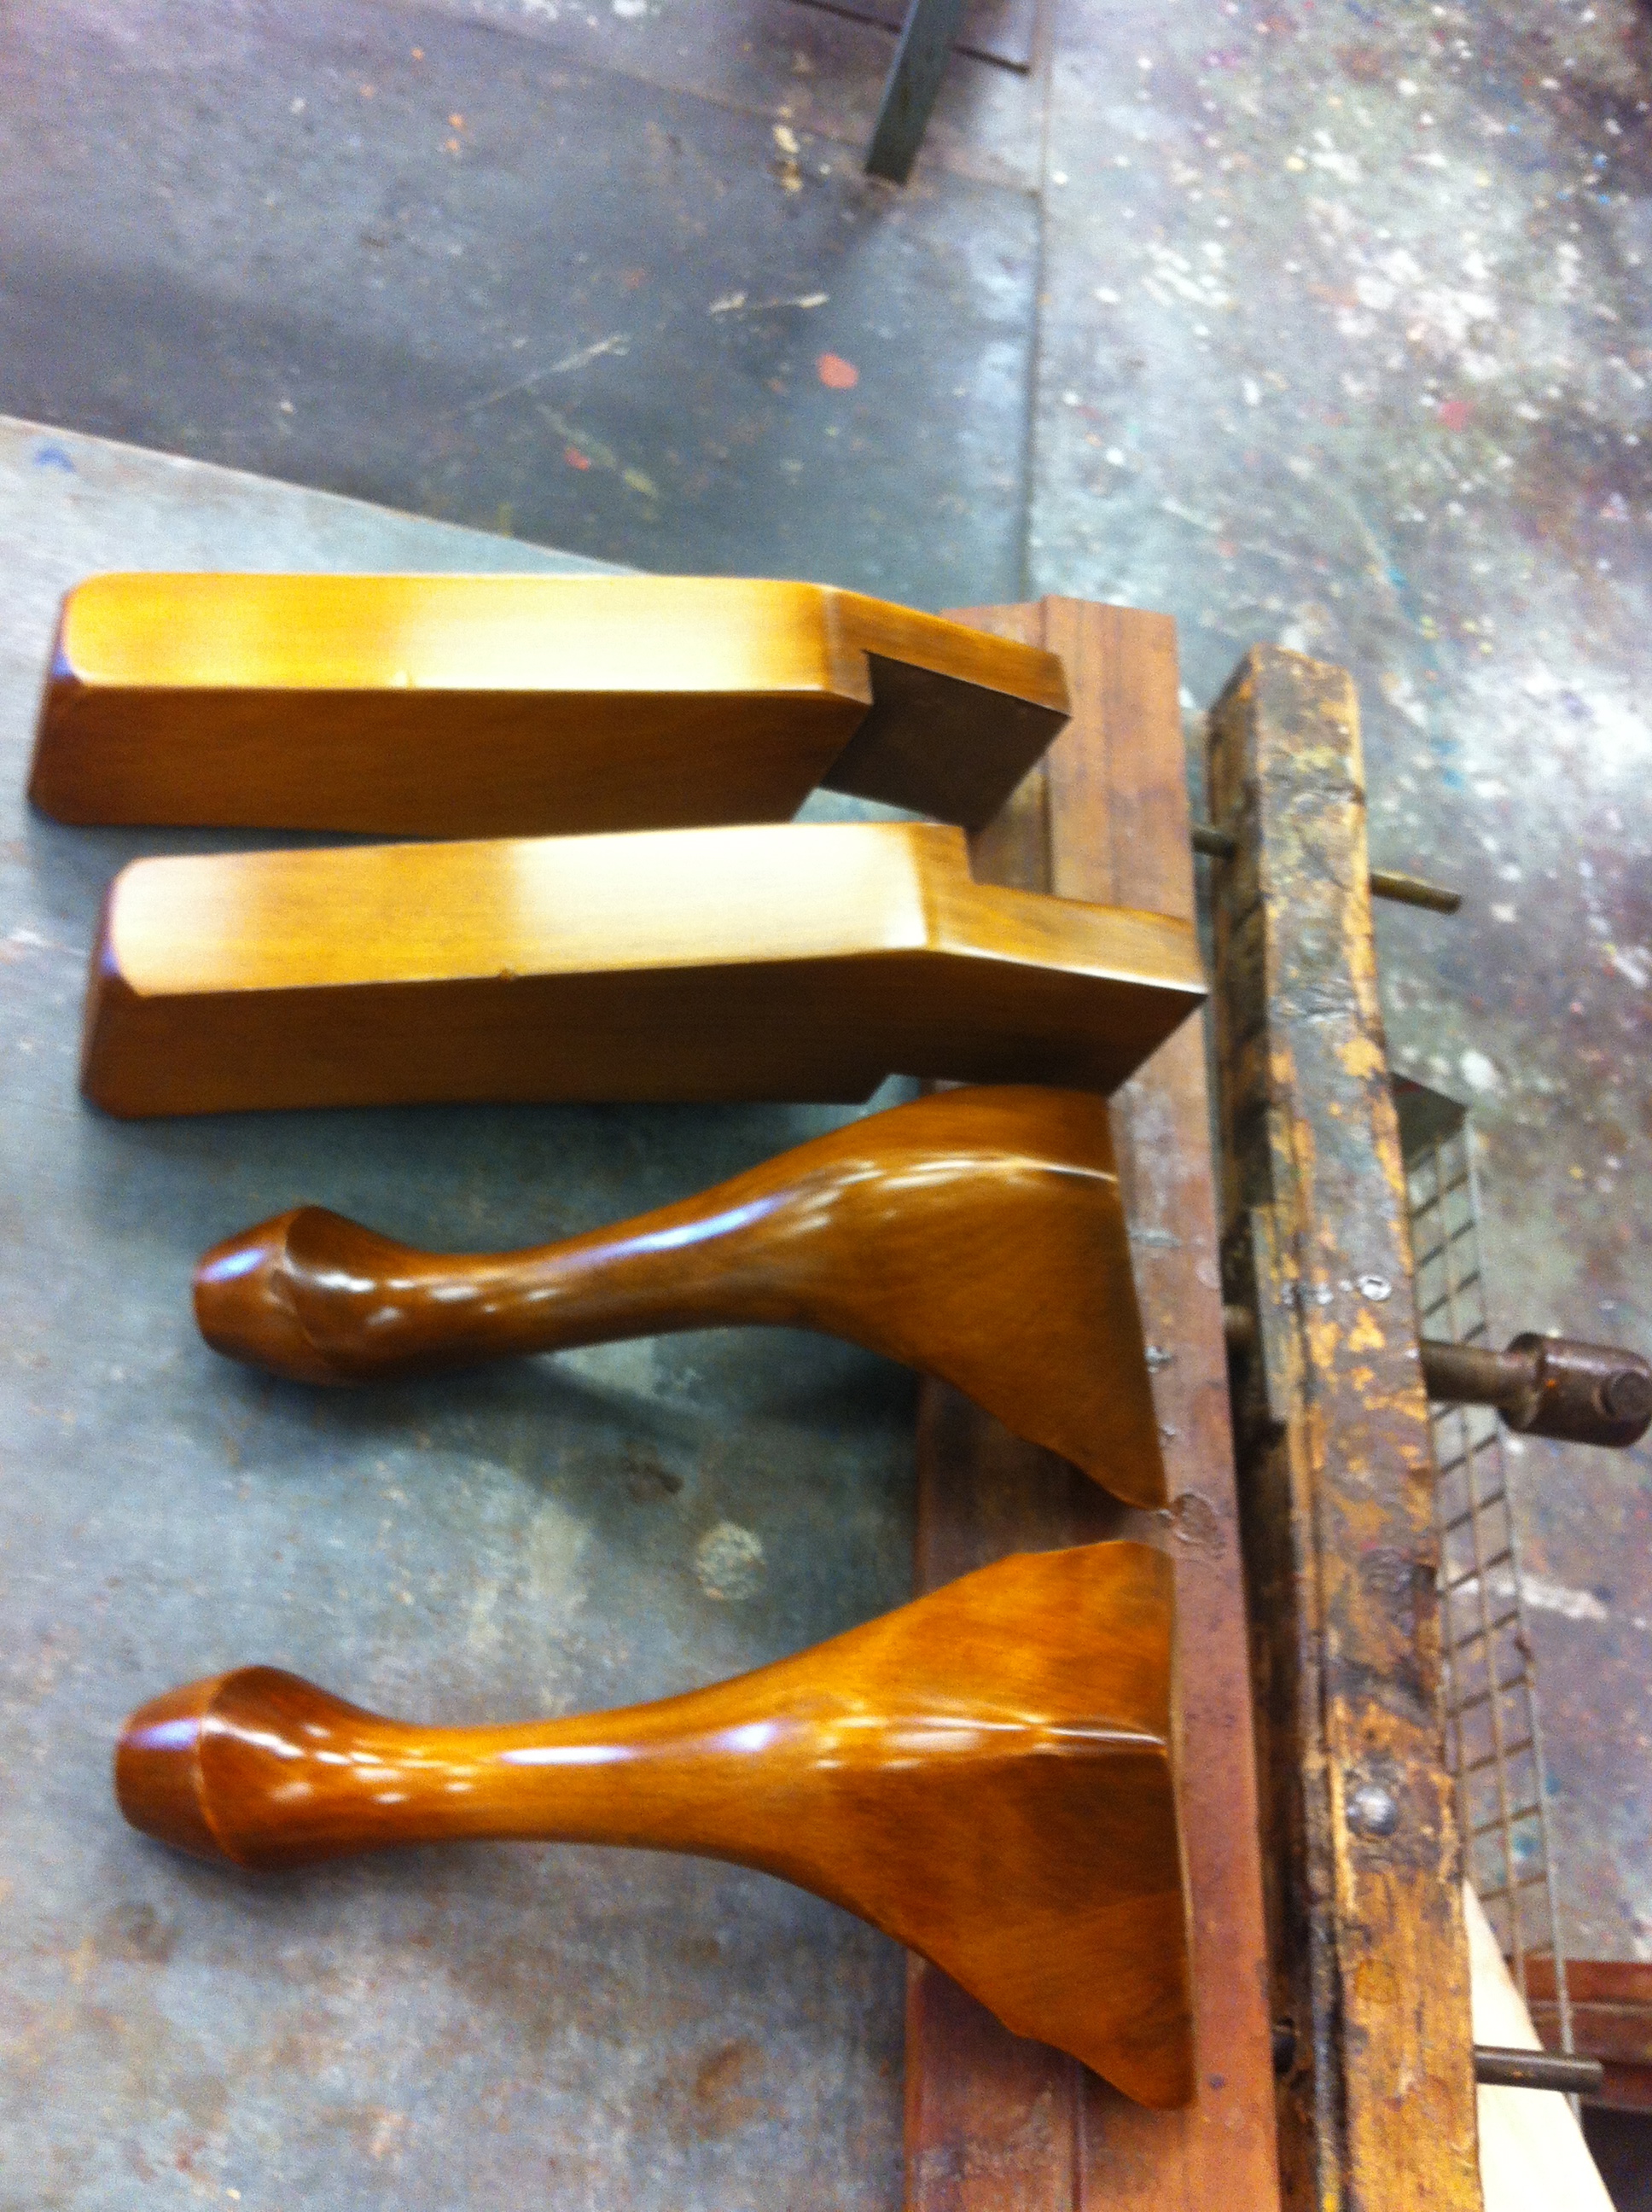
My client wanted a wingback chair for her formal lounge but with a contemporary look.
I managed to find this great paisley fabric with a matching stripe – she loved it. Looks fab with her other lounges which are in a dark leather.
To finish the chair off I hand polished the legs to get a warm, golden, antique look.
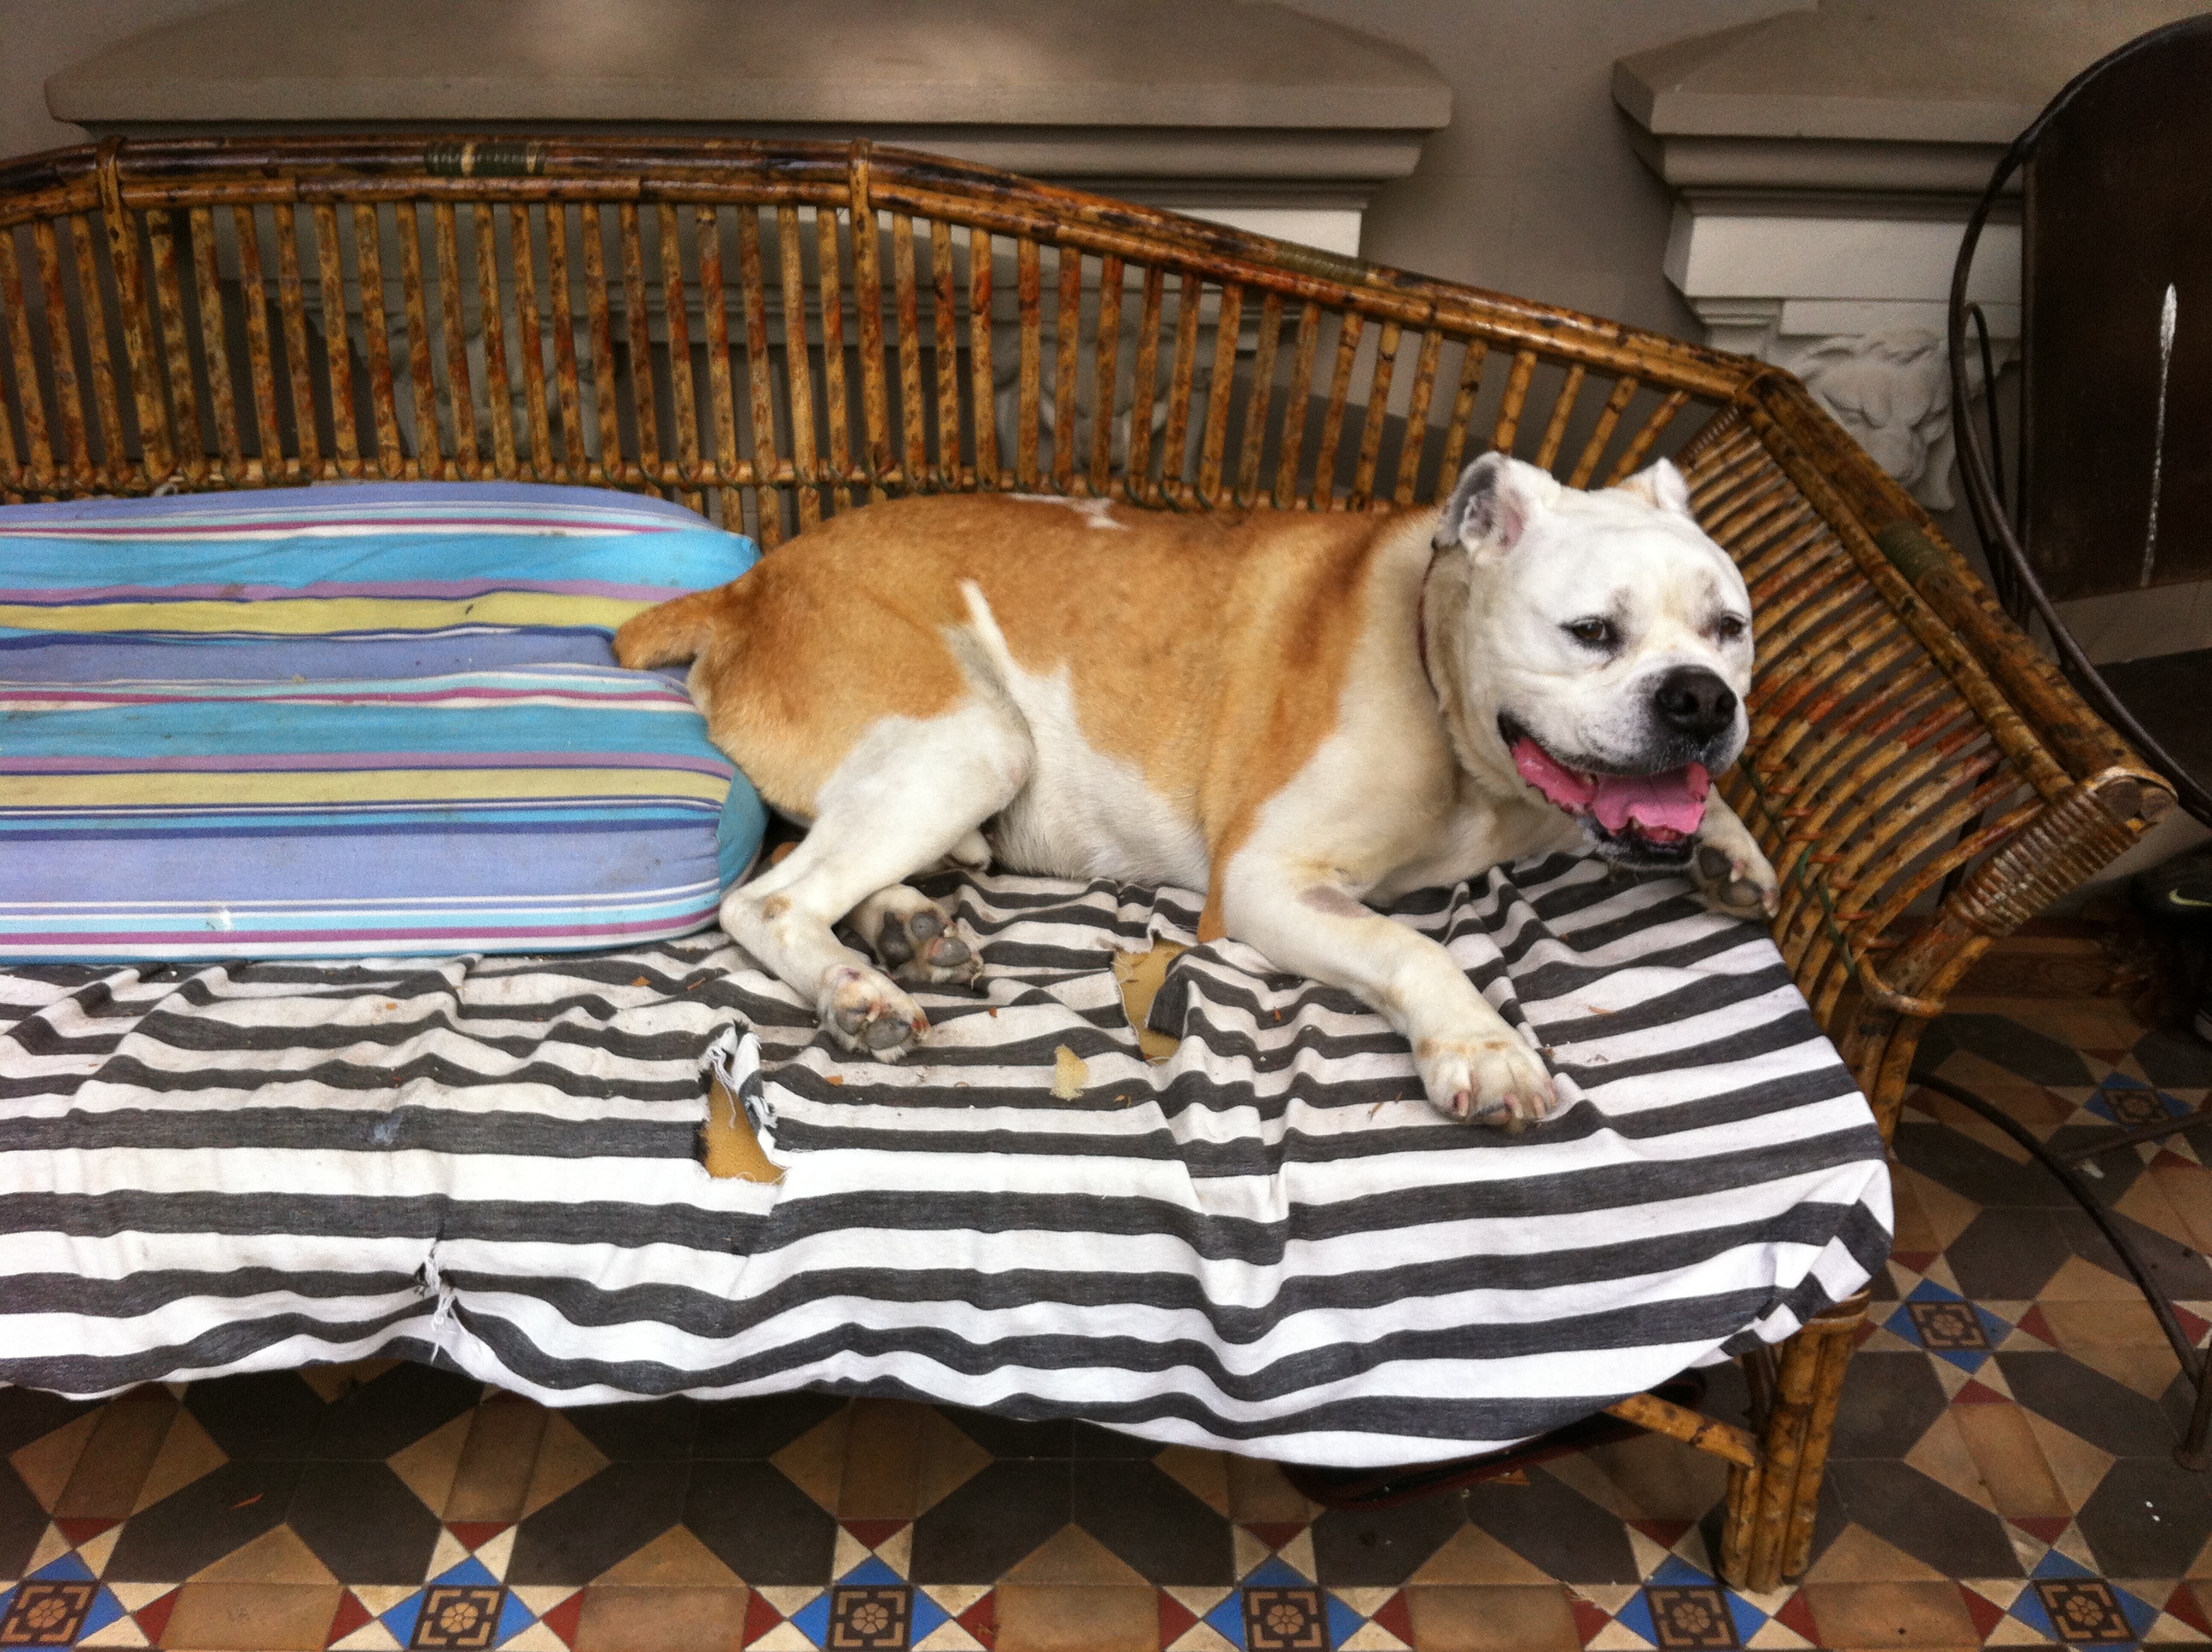 Ok – enough is enough ……….it is high time the cushion for the outdoor rattan lounge was recovered. Yes, I know Jed looks very comfortable and even once a new cover is completed I’m sure he will like it just as well.
I am using an outdoor foam which is more expensive, but it allows any water to run through.
It came slightly too big. As I don’t have a foam cutter (they are quite expensive) I am using an electric bread cutter (you can get one under $ 20.00). No, I’m not completely NUTS, it does a pretty good job.
As long as you have the line marked and cut straight up and down it does a fairly good job.


Once the foam was cut it was just a matter of cutting the material and get sewing. I love the contrast of pattern on one side and the stripe on the other. Instead of a zip I decided to put velcro right down one side as I am sure the dog will still make it his resting place – therefore frequent washing. It makes it easier to get the cover off and on.


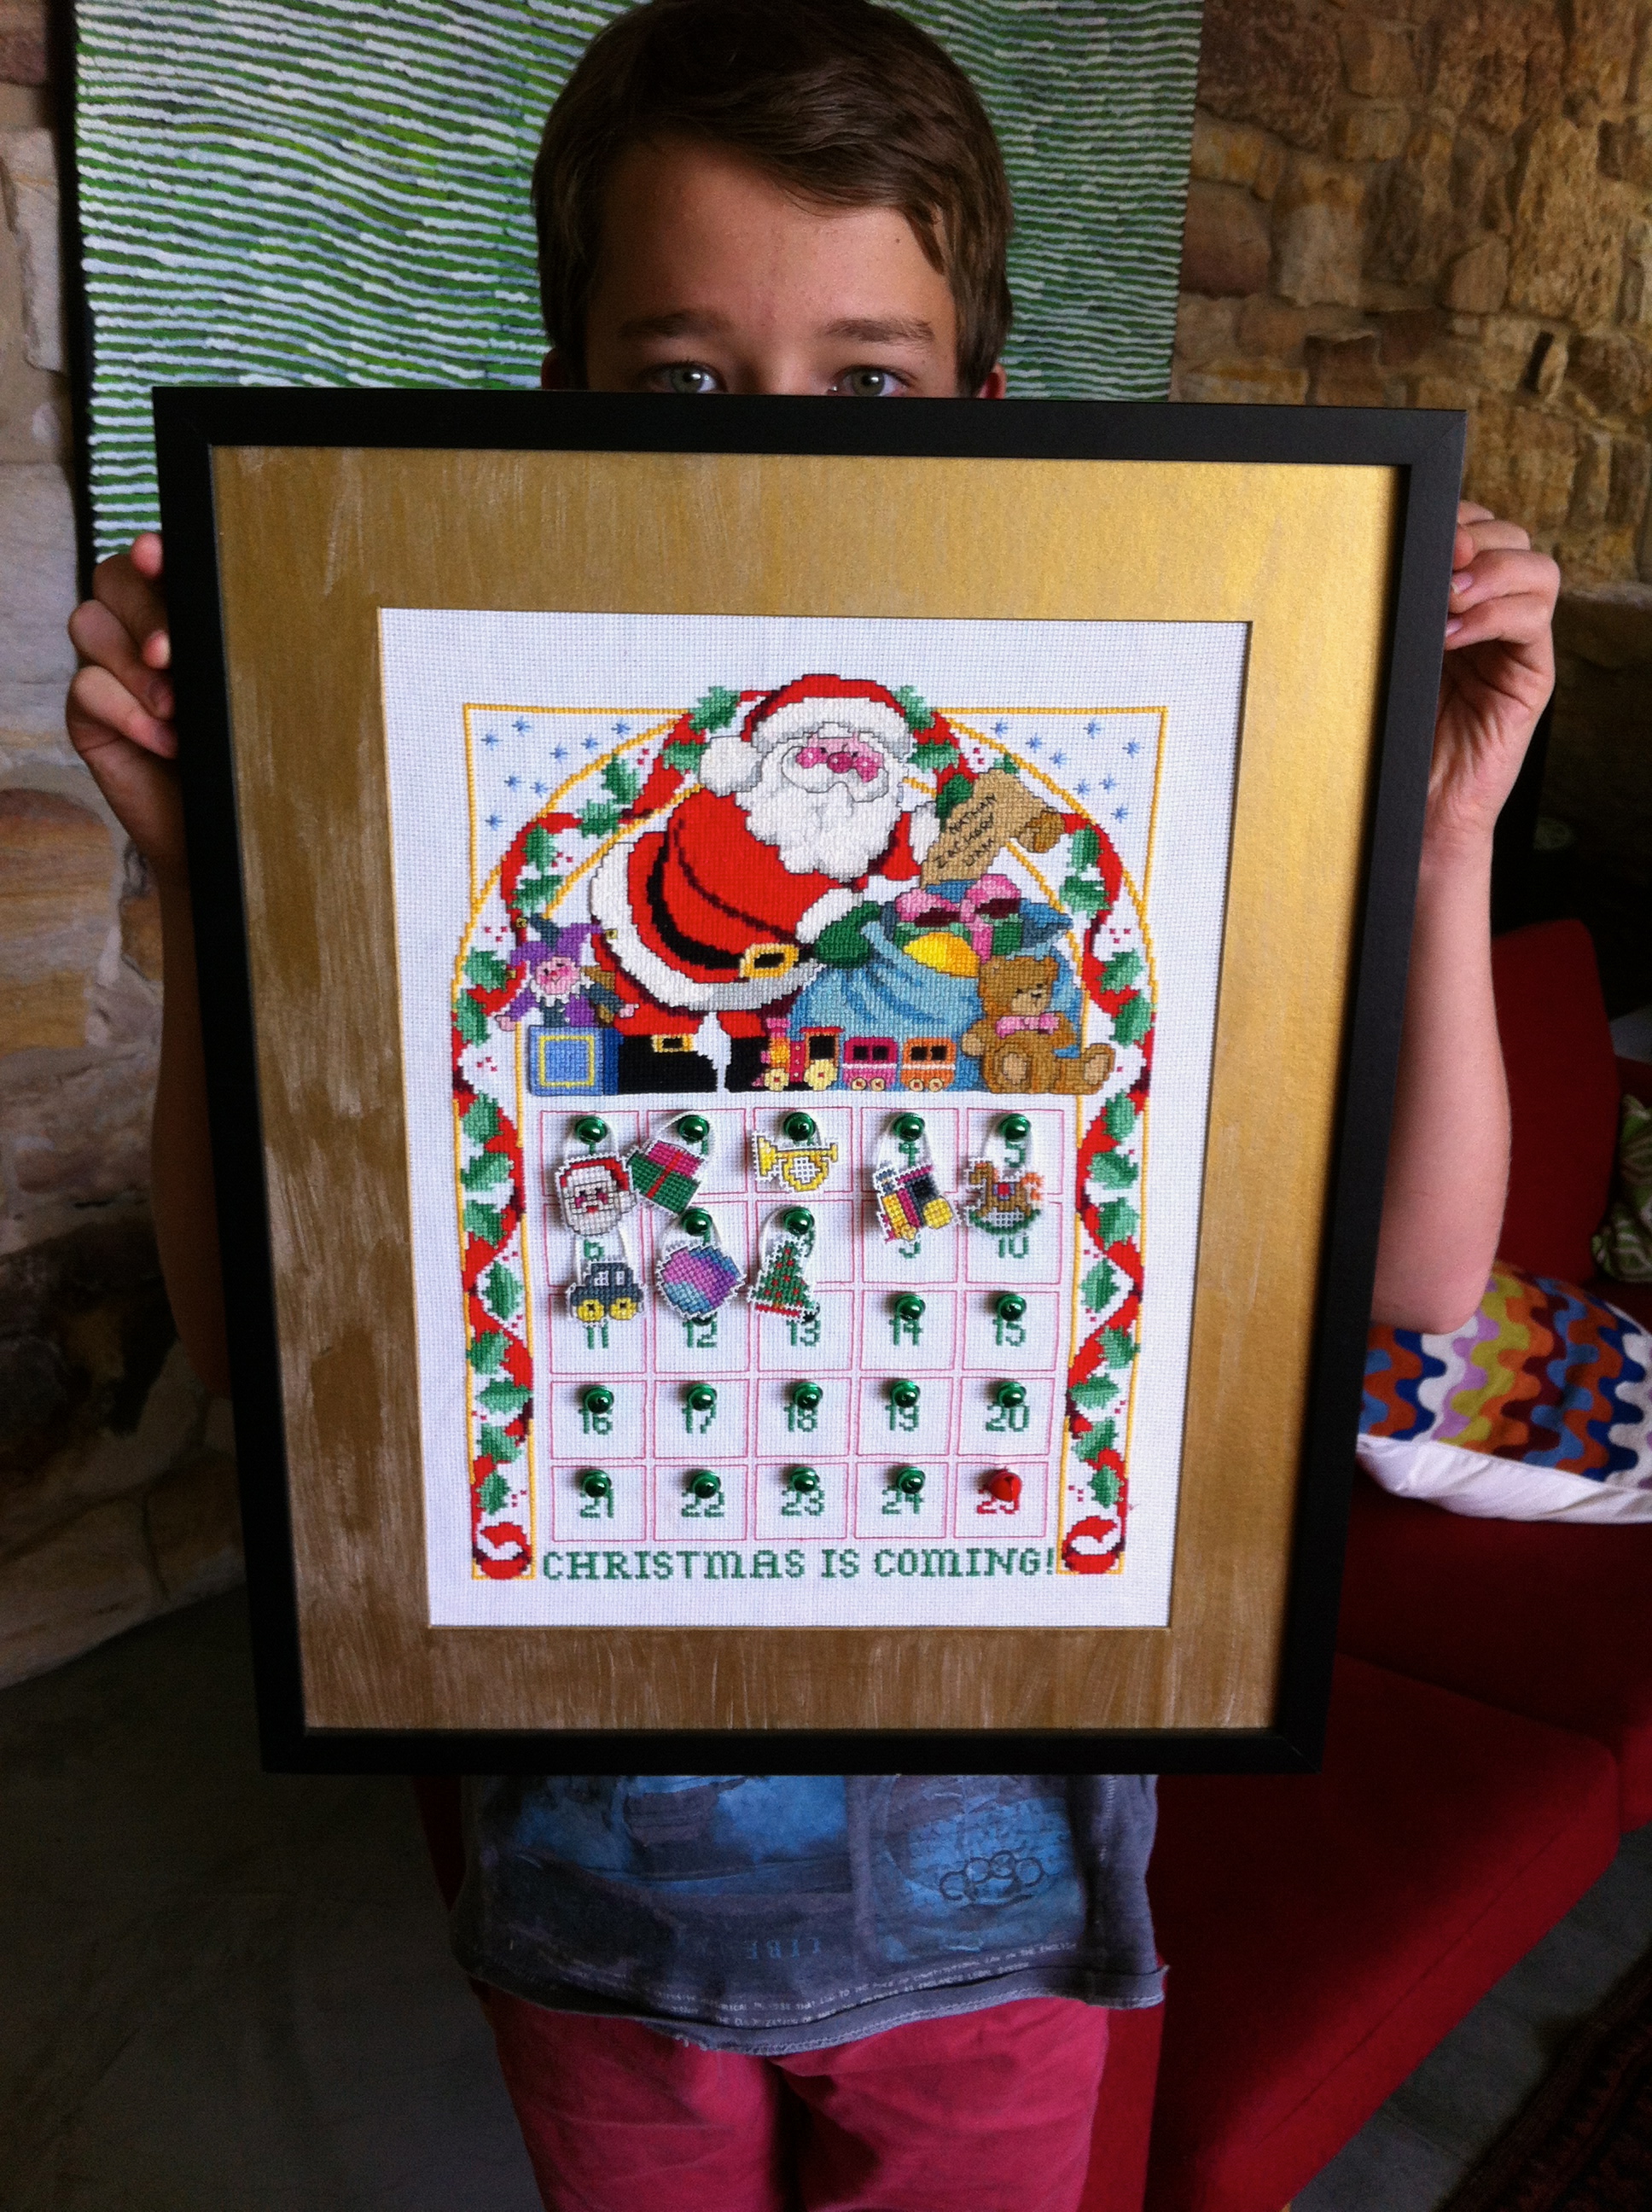
Christmas time for me is all about spending time with family and friends plus about following traditions that have been established over the years.
It seems no matter what age we are, there are certain things that must happen – lights are put out in front of the house in competition with the neighbours, a real Christmas tree is purchased and the old decorations are put on – of course waiting till everyone is home to do so (which is getting harder the older they get), presents are purchased for each other(for 3 boys this can be challenging) I think this is the only time of year they go into a shop and the advent calendar is set up.
Their Grandmother embroidered the calendar for them when they were little but it stills takes pride and place on the mantle.
SEASON GREETINGS everyone have happy & safe holidays, hope you all get to enjoy a bit of time out.
See you in 2014 with new projects.


Sometimes the simple jobs turn out to be the most effective.

I have two amazing retro stools – Ok they are looking a bit worst for wear but I love the colour and they are comfortable.
After careful consideration about maybe putting on new vinyl I decided to keep the integrity of the stools and just redo the buttons.
When I took the base of the stool off I found there was a piece of vinyl covering the bottom of the stool that I could use to make new buttons without disturbing the rest of the stool YA…………


In the end it was an easier job than I first thought but very satisfying.


It is always a great feeling seeing your work, back where it belongs, looking fabulous.
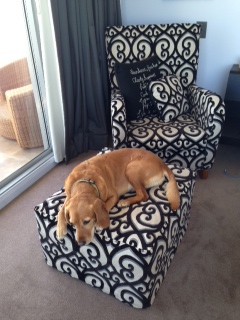
Alba is happy again with her favourite piece of furniture back.

Recent Comments